Table Of Content
UI2 Get Started
UI2 Features
UI2 Info Map
UI2 BP Actors
UI2 User Manager
UI2 FAQ
UI2 Tutorials
Arch Viz UI & Tools - Getting Started
Follow the steps here to get started with the Arch Viz User Interface
NOTE: This product has
been superseded by
Arch Viz
User Interface V3 (UI3)
Content:
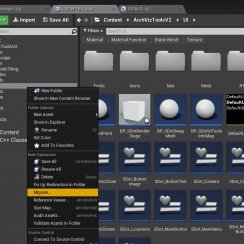
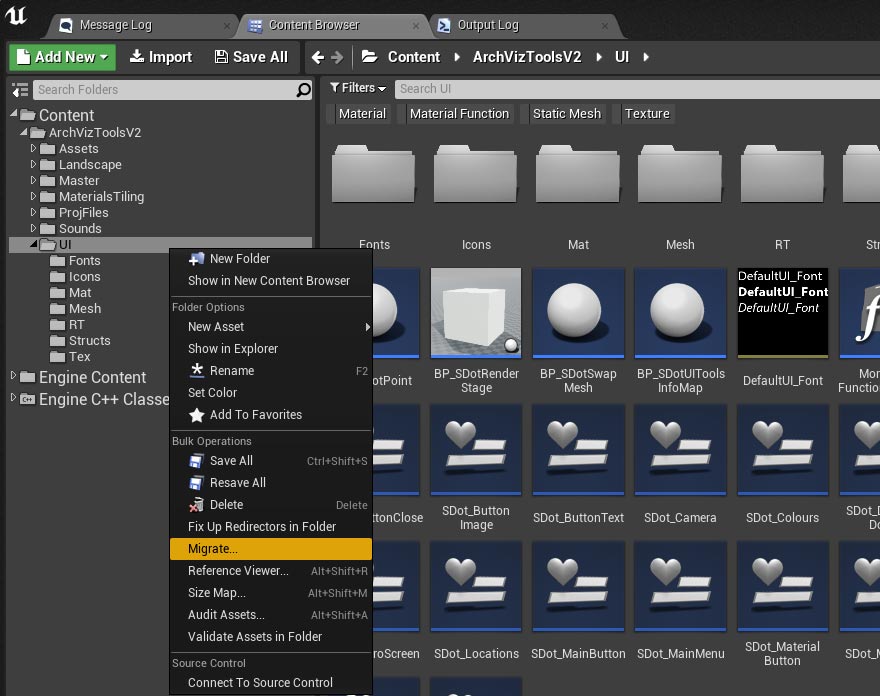
1. Migrate User Interface
Go to your library in the Unreal Launcher, look for the ArchViz UI and Interactive Tools project and use the option to create a new project. Choose the desired engine version and shorten the project name a bit to 20 letters max.Open this project and then migrate the user interface to your personal project's Content folder:
- Migrate just the UI folder to get all UI-related assets and blueprints.
- Migrate the ArchVizToolsV2 folder if you want to use assets used in the example project.
NOTE:
This documentation covers version 2.0 and later of the User
Interface first released
on August 8 2019 for Unreal Engine 4.22 and later.
All actors for version 2 live in the folder
Content/ArchVizToolsV2 while
version 1 was located in folder Content/ArchVizUI.
2. Project and World Settings
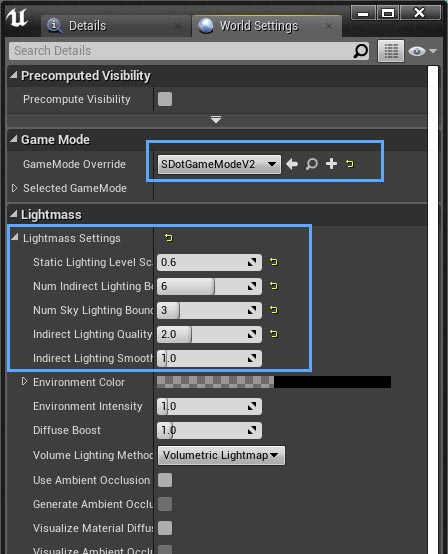
Open the persistent level of the current scene you want to run the interface with. Then go to the World Settings and set the GameMode Override to SDotGameModeV2.Once in the world settings you can tweak the Lightmass Settings to get better lighting in your scene. In the example image the changes are fairly moderate and won't overly extend your build time.
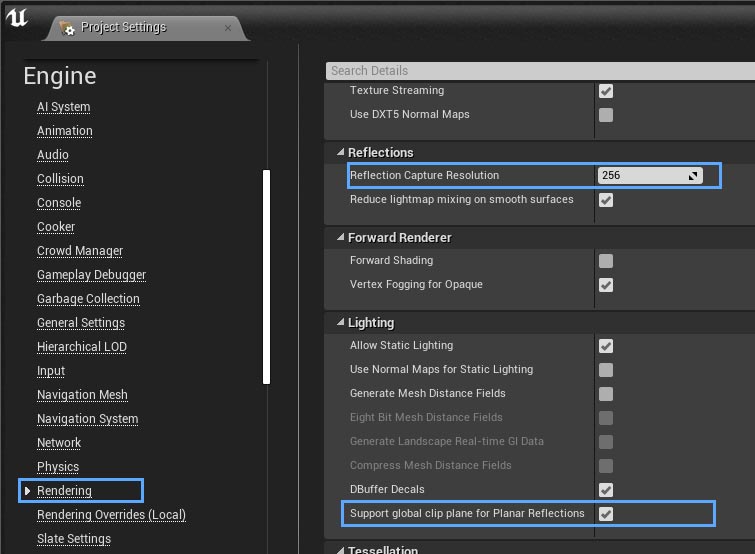
- Set the Reflection Capture Resolution to something higher than the default. No need to go crazy with it.
- If you want to use planar reflection for large mirrors then activate Support global clip plane for Planar Reflection. This will take away a tiny bit of performance so only activate it when necessary.
You will be prompted to restart the editor. So close the editor because we need to add a config file in the next step.
You can also set the 'Editor Startup Map' and 'Game Default Map' to your persistent level in the 'Maps and Modes' section.
3. Copy DefaultInput.ini
Copy the file DefaultInput.ini from the ArchVizUIToolsV2 project to your project. The file is in the 'Config' folder and that's where it needs to go in your project.
4. Place the Info Map Blueprint
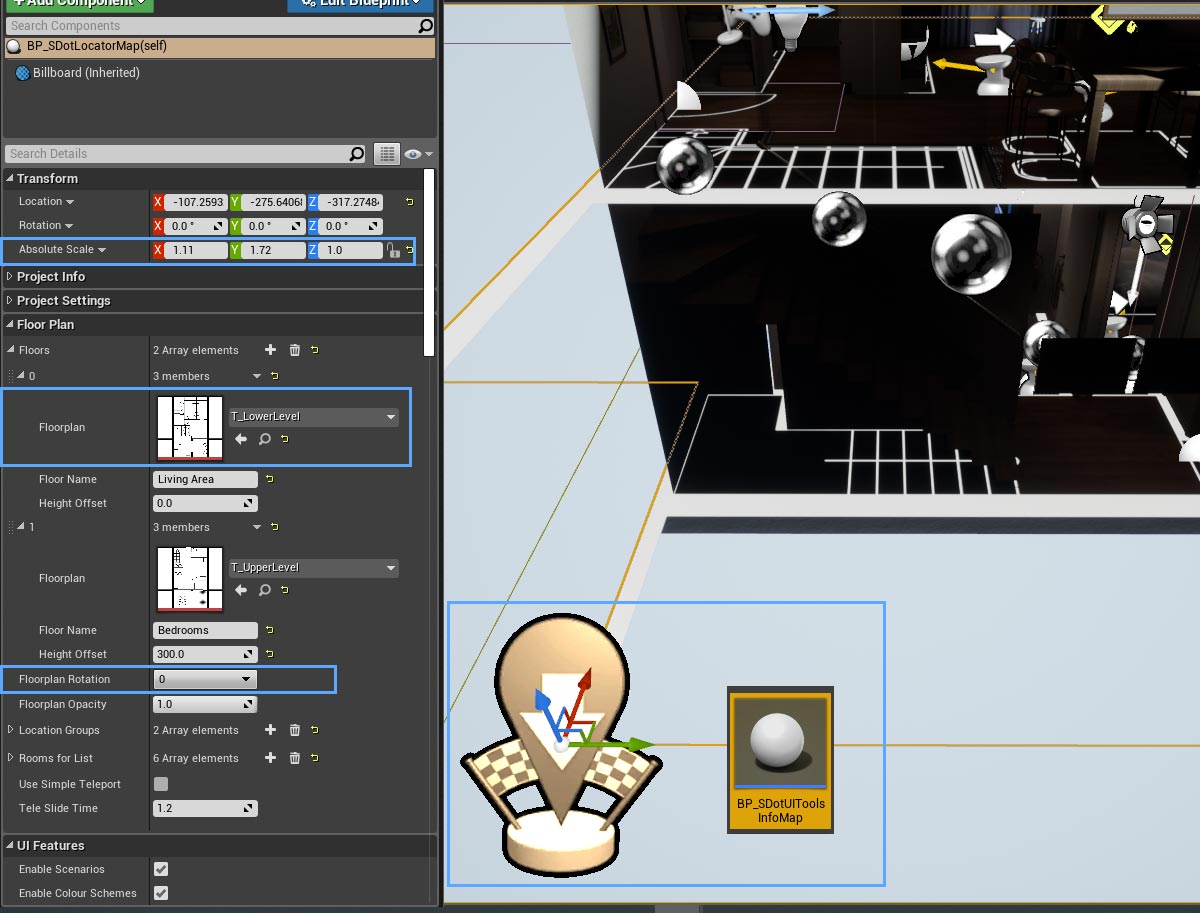
Drag the BP_SDotUIToolsInfoMap into the scene. You can add a floor plan texture to it and rotate it with the Floorplan Rotation settings. You can't use the Transform/Rotation but you can align and scale it with the Transform values as good as it goes.If you don't have a floor plan texture, the default texture will do for now. But you will need a floor plan texture eventually.
5. Place a Player Start
6. Add the Preview Renderer
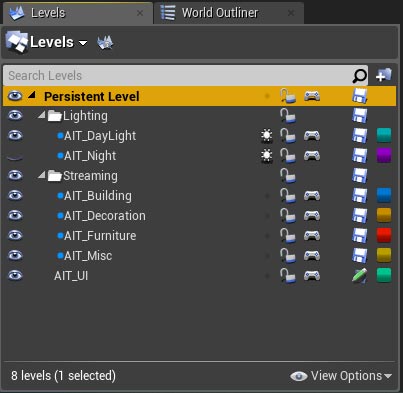
Place a player start and a Blocking Volume underneath into your Persistent Level. The blocking volume will keep the player from falling through the floor while the floor mesh is loading.There shouldn't be any more assets in the persistent level. You will need a different persistent level for recording sequences. More in the Examples section.
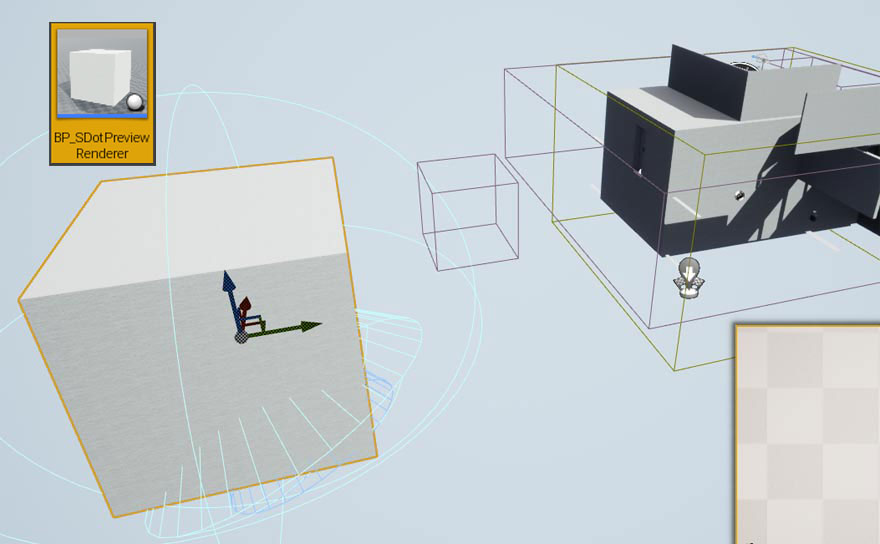
The Render Stage will auto-generate preview thumbs if no custom thumb texture has been provided. All you need to do is drag the blueprint BP_SDotRenderStage into the scene. Move it far away enough from the main scene so no light can interfere with the render stage and the other way around.The Render Stage can render up to 20 thumbs for each choice.
Make sure the main post process volume for the scene is unbound or extend/copy it to cover the Render Stage as well.
Some HDRI images in the skylight or fog can cause weird artifacts in the preview thumbs created with the Render Stage. Try to disable fog or the HDRI in the skylight if your preview thumbs are distorted.
 Top of page