Table Of Content
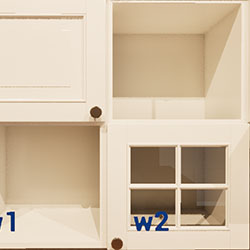
Quick Guide 2026
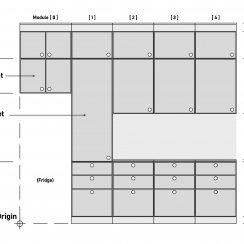
System Drawings
Custom Assets
Swap 2025
Ver History
Modular Kitchen Builder Quick Guide 2026
Quick Guide for the 2025 Version of the Modular Kitchen Builder.
The 2025 version has 2 main blueprint actors to create modular kitchens. This guide is for the blueprint BP_KitchenBuilder2025. This blueprint allows to set the base and wall cabinets independently from each other.
Content:
BP_KitchenBuilder is the first (older) version of the Kitchen Builder Blueprint. It has less options and remains in the project only for compatibility reasons.
- Base and tall cabinets always have the same width
- There is only one black ID marker per module
 [Legacy] Documentation for BP_KitchenBuilder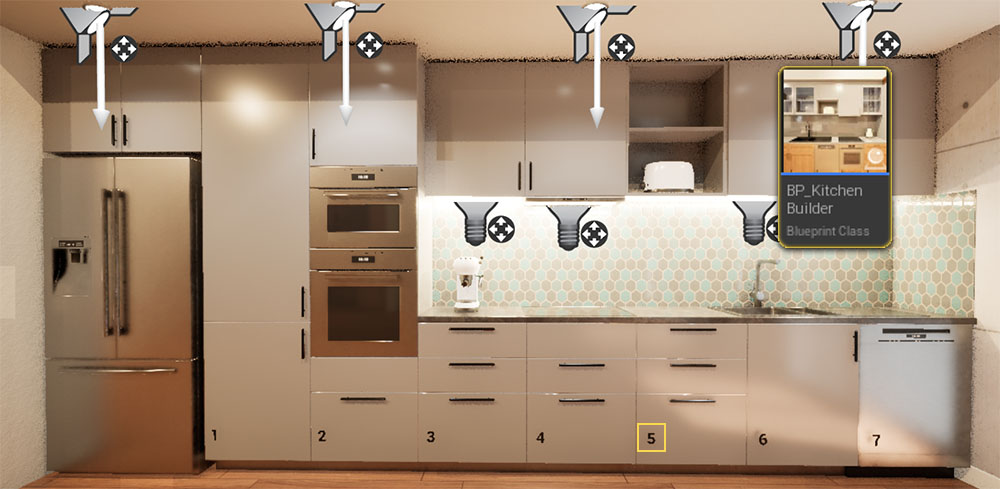
Blueprint Placement
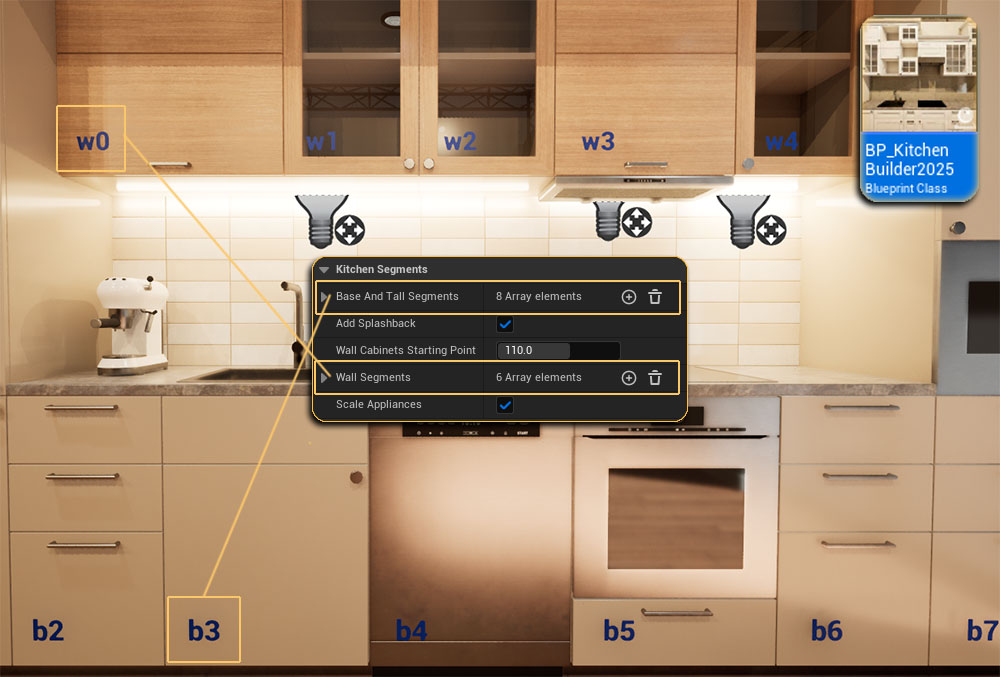
BP_KitchenBuilder2025This guide is for the 2025 version of the Modular Kitchen Builder.
Base and Tall Segments
This array is for adding base and tall cabinets. Any cabinet that is 60 cm (24 in) deep needs to be added here.
Wall Segments
This array is for adding wall cabinets. Any cabinet hanging on the wall needs to be added here. The default depth is 33 cm (13 in).
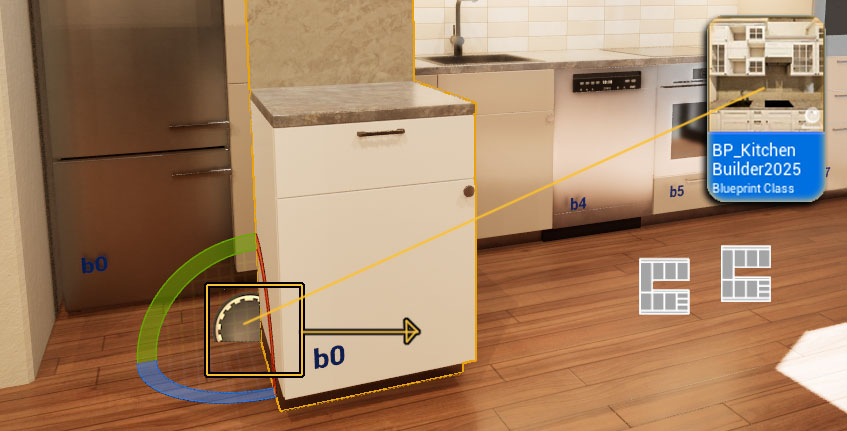
Drag the blueprint from the Content Browser into the scene. The kitchen will be build to the right side of the origin.
Rotate and move it into place.
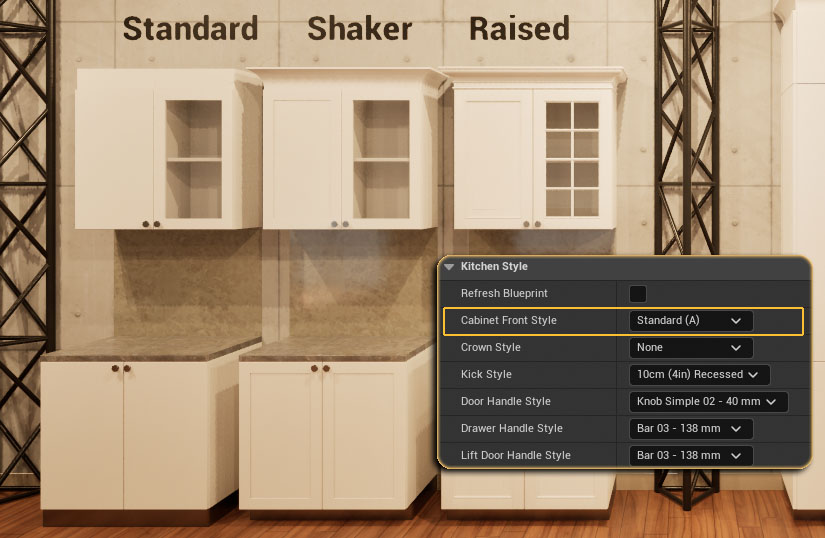
Kitchen Style
Select or change the style for the kitchen here.
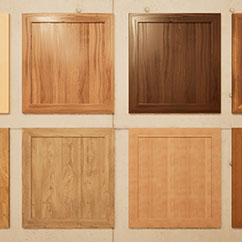
Front Style
Front style as seen in the image. There are 4 styles available at the moment.
Handles
- Door Handles are for standard doors
- Drawer Handles are for standard drawers
- Lift Door Handles are for doors that open upwards and not to the side.
Bench Style
A bench edge style can be selected (new 2026-03)
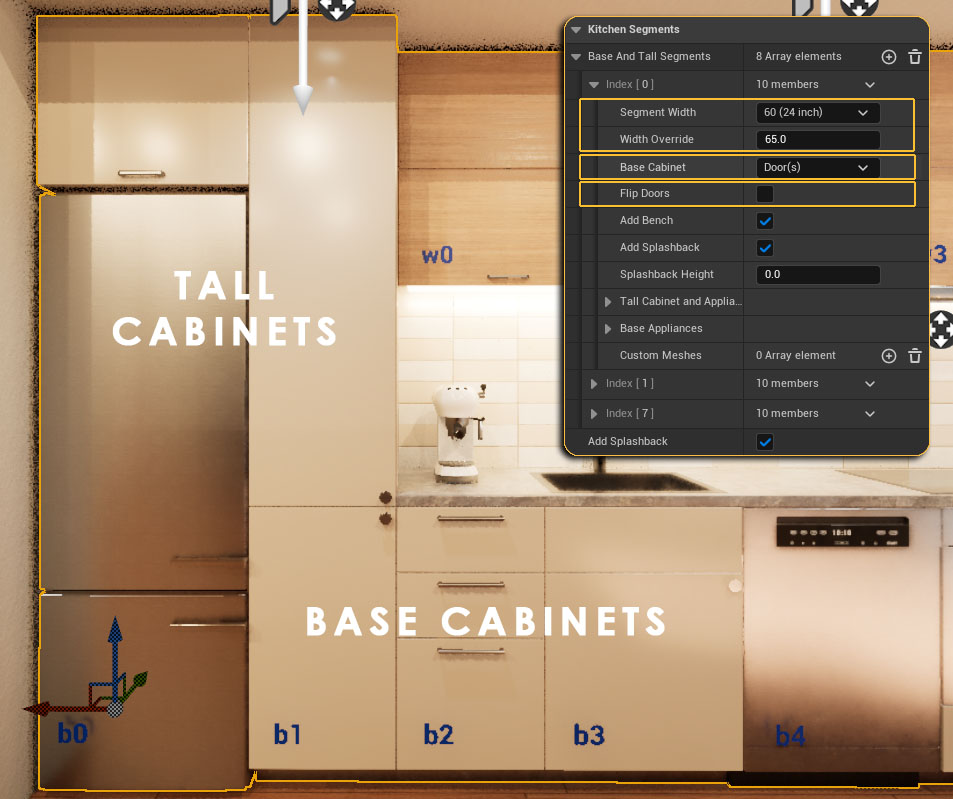
Base and Tall Segments
Cabinets that are 60 cm or 24 inches deep.
Segment Width
Select the (closest) standard width from the list. Adjust the width with the Width Override if necessary.
Base Cabinet
Select a standard cabinet front style from the list
Flip Doors
Put the door handle on the other side.
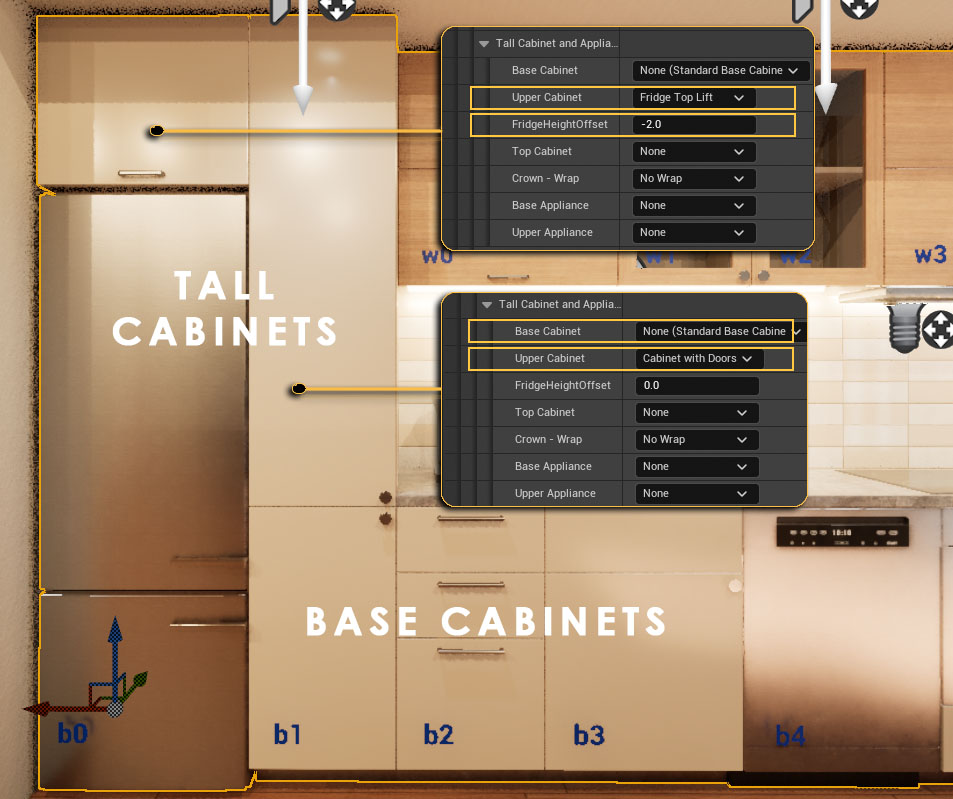
Tall Cabinet and Appliances
- Base Cabinet
Choose None (Standard Base Cabinet to keep the standard cabinet set as Base Cabinet above.
- Upper Cabinet
Fridge Top or Cabinet With Doors in the example.
- Fridge Height Offset
Fridge Top height offset to adjust the cabinet to the selected fridge.
Appliances
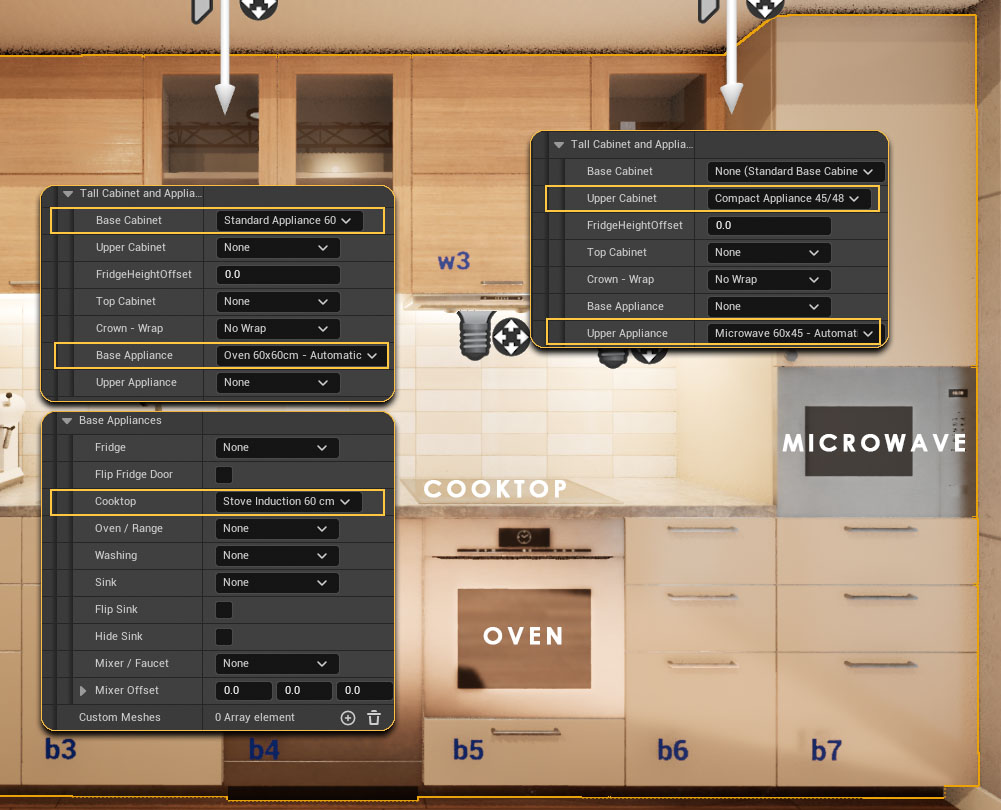
Tall Cabinet and Appliances
- Base and Upper Cabinet
Select the cabinet (size) for built in appliances from the list
- Base and Upper Appliances
Select the built-in appliance(s) from the list
Built-in appliances come in 3 standard sizes
(width x height)
- 60 x 60
- 60 x 45
- 90 x 48
Base Appliances
Fridge, Dishwasher, Cooktop, Sink and Faucet, etc. are added in this section. Generally these are appliances that are not build into special cabinets.
Wall Segments
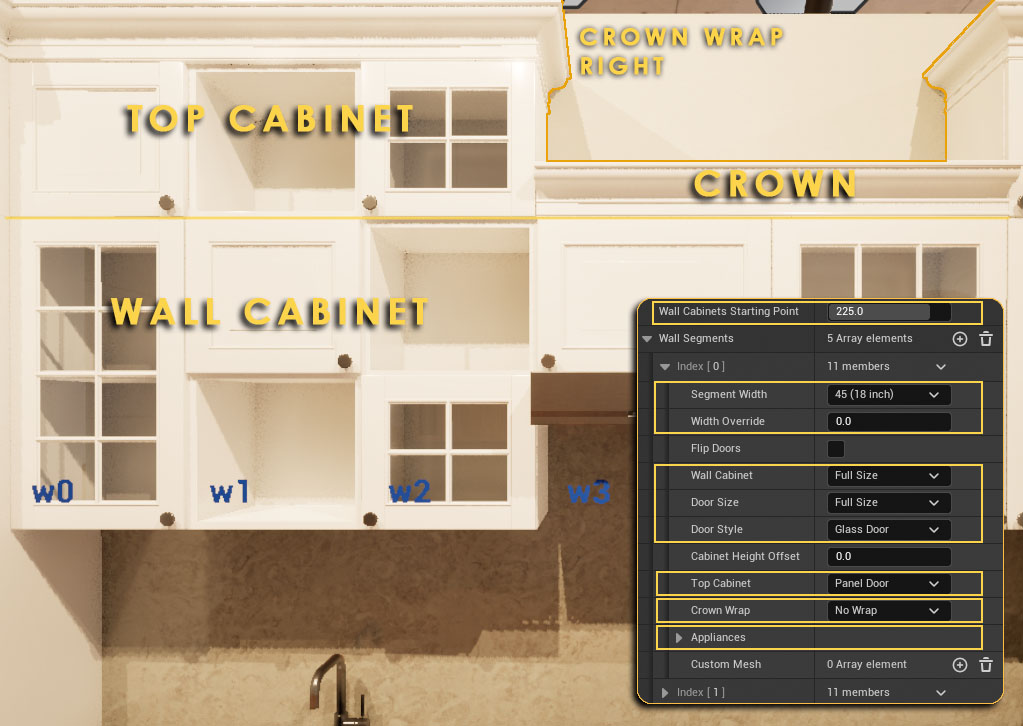
Wall Segment Starting Point
The distance from the blueprint origin on the very left side. Usually the width of the fridge or tall cabinets placed to the left.
Segment Width
Segment width for this wall segment. Can be overwritten if necessary.
Wall Cabinet
Select the size (height) of the cabinet, and the door type and height.
Top Cabinet
Optionally select the type of an additional top cabinet and its door type.
Crown Wrap
The crown can be wrapped around any cabinet that has its side visible.
Appliances
Select appliances that are placed in or under the wall cabinets (range hood or microwave)
Dimensions
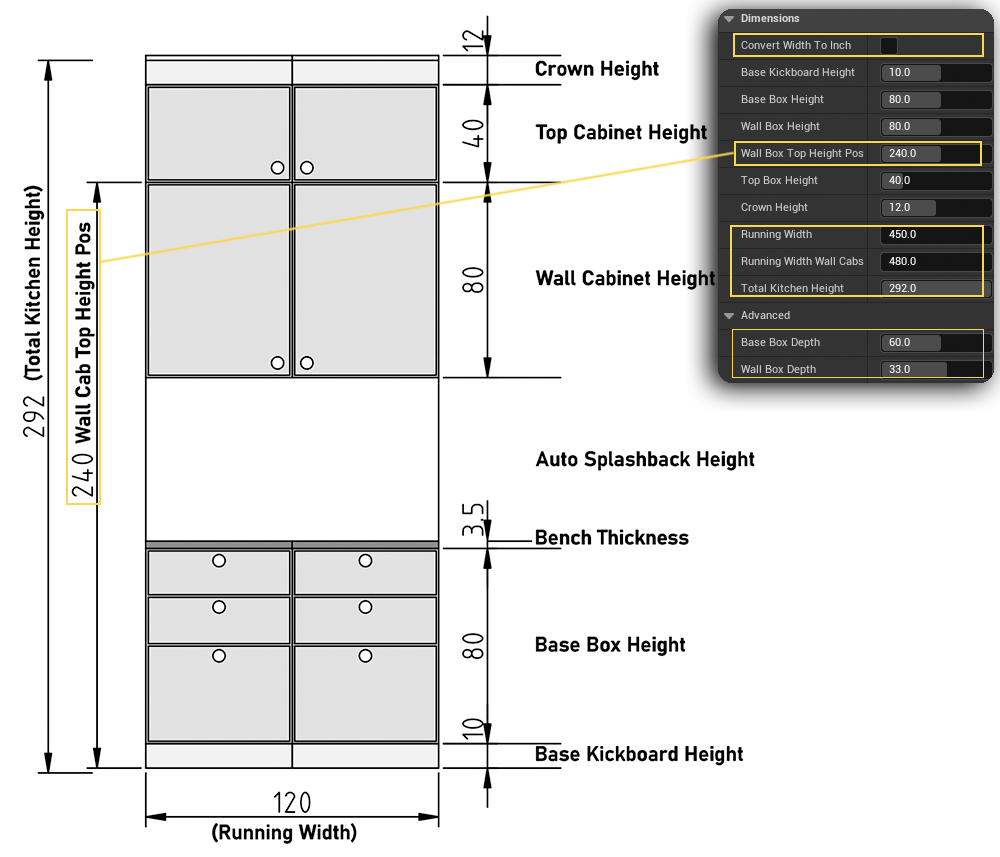
Convert Width to Inch
This will use the precise width converted from inches if precision is needed. Dimensions here will stay in cm.
Wall Box Top Height
The height of the kitchen without top cabinets or a crown
Running Width and Total Height
The results of the dimension set here and all added segments total width.
Depth (Advanced)
The cabinet depth can be set here but this will break an added corner module.
Bench Dimensions
Bench depth and overhang size have been
moved here in newer versions
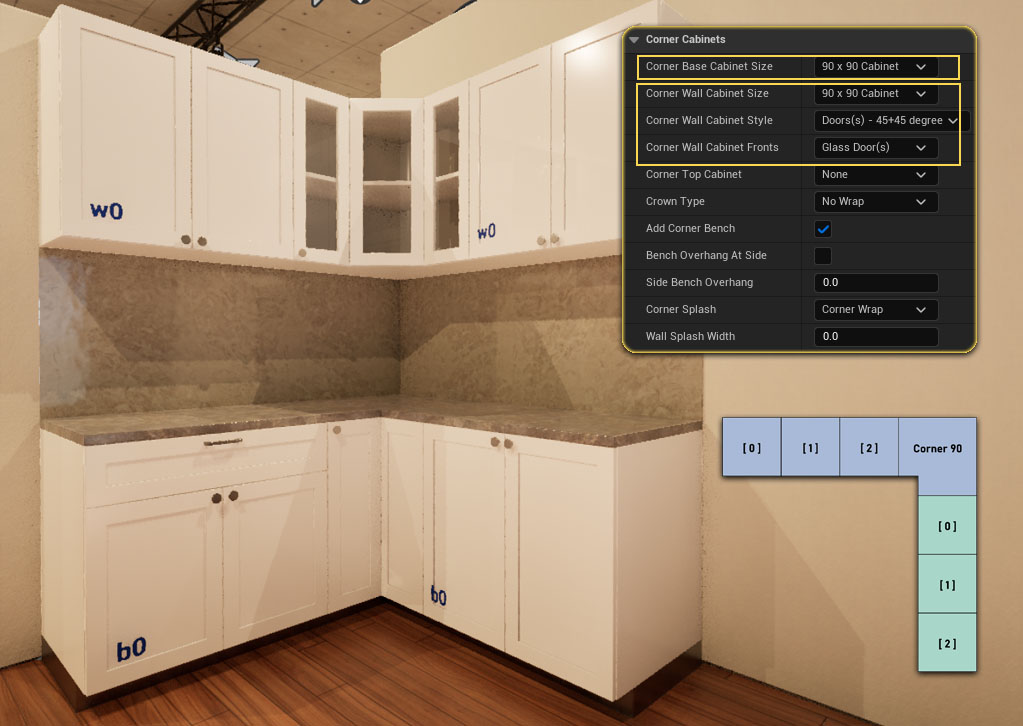
Corner Cabinets
Corner Cabinets can be added to the right side, at the end of the segments.
Another Kitchen blueprint needs to be added for a full L- Shaped kitchen layout.
Corner Base Cabinet
Choose a 90 or 62 cm wide corner element.
Corner Wall Cabinet
Select the width, shape and front style of the wall cabinets.
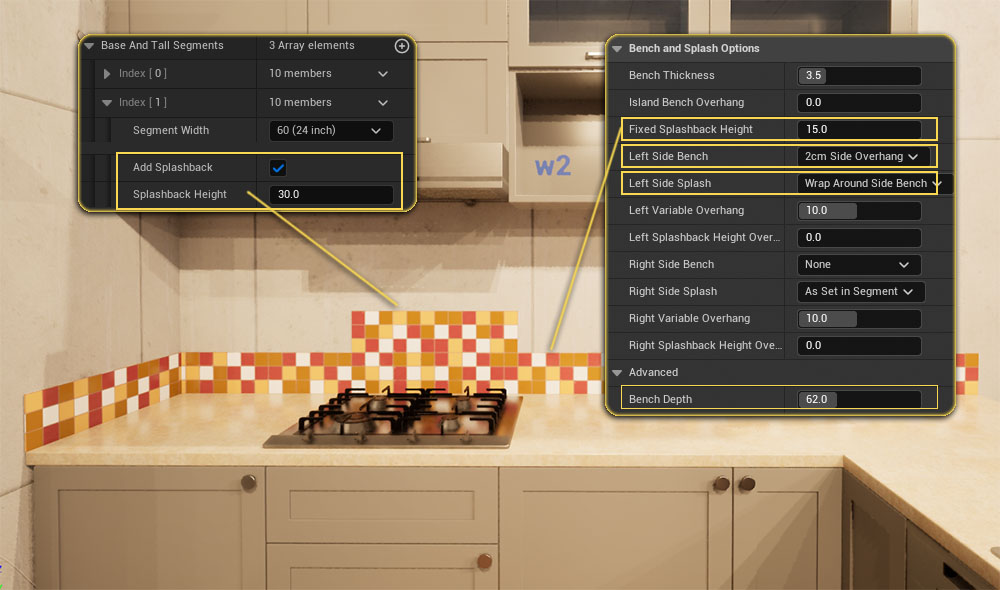
Bench And Splashback
Splash Back Height
Can be set for all segments here and be overwritten in each segment. A width of 0.00 will fill the space between bench and wall cabinet.
Side Bench and Splashback
The bench can overhang to the left or right side. Or it can cover the side of the base (wrap) cabinet as common for kitchen islands.
The splash back can cover the side wall along the bench
Bench Edge
One of 6 bench edge styles can be selected
in the Kitchen Style section
Bench Dimensions
Bench depth and overhang size have been
moved to the Dimensions section in newer
versions
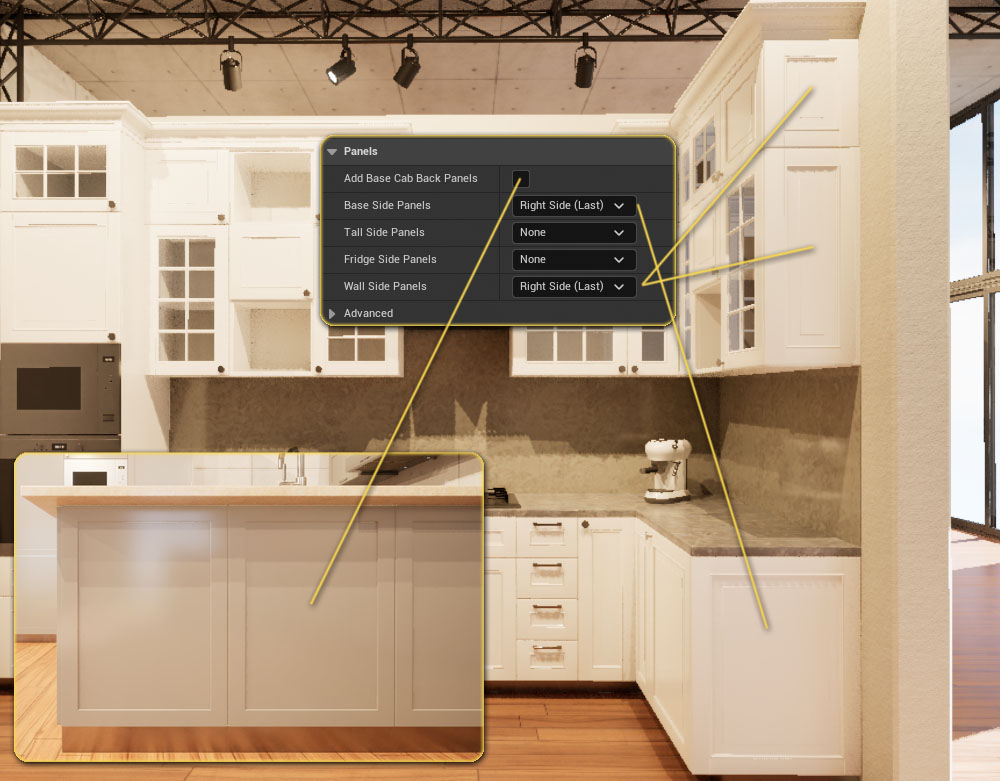
Side or Back Panels
Base Cabinet Back Panels
Door front panels are added as back panels as is common for kitchen islands
Side Panels
Door front panels are added at the left or right side of the kitchen
Bench Wrap
The Bench can wrap down on each side of a kitchen island. This can be set in
the Bench section
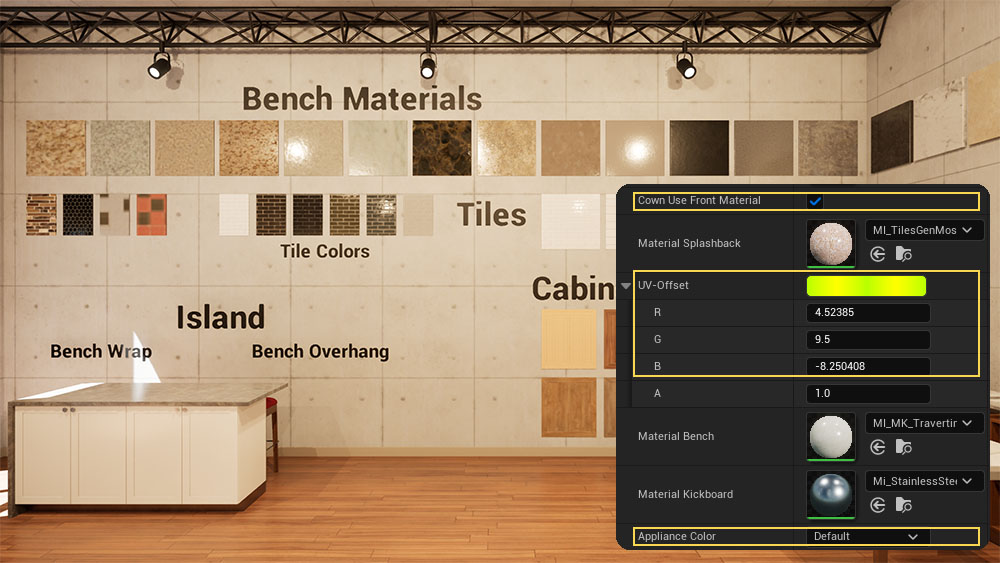
Materials
Crown Use Front Material
The crown can use the material set for fronts or for cabinets.
Splash Back Material UV Offset
The Tile Material's UVs that come with the project can be adjusted when used for the splash back.
Appliance and Handle Color Schemes
Choose the material style for the appliances used in the kitchen. Default will keep the default materials set for the mesh.
Options to change Sink, Mixer, and Handles materials have been added in newer versions
Saves
The kitchen layout and style can be saved in a data table to be reused later. The default data table is DT_KItchenSaves_2026
This feature has been added in the 2026-03 version
The default data table DT_KitchenSaves_2025 may not contain all data. Use the link below or manually update the data table yourself as shown below.
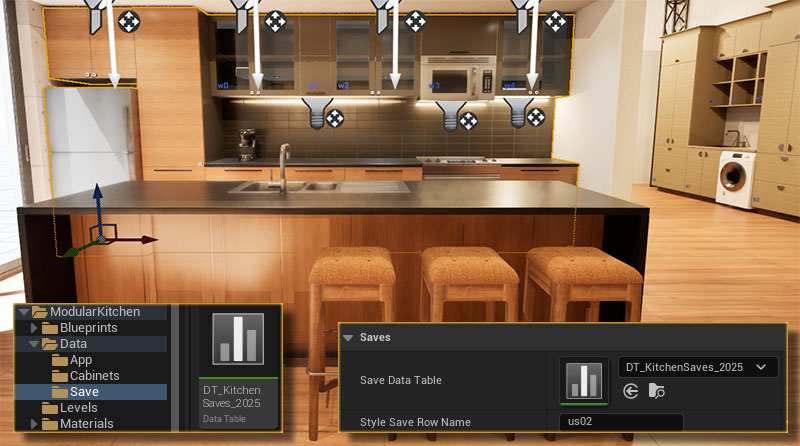
Load a data row from the data table
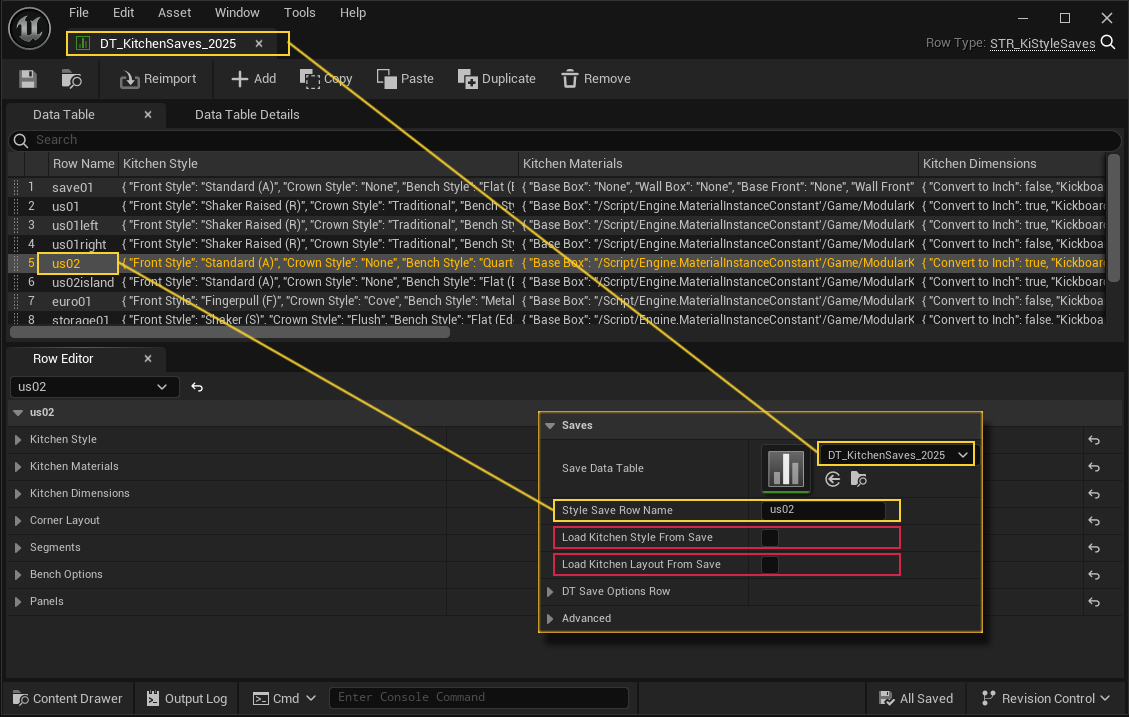
- Enter the data table row name
- Click one or both of the tick boxes twice to load the
- Kitchen Style
- or Kitchen Layout
This will overwrite all changes for this kitchen blueprint in the scene. It cannot be undone.
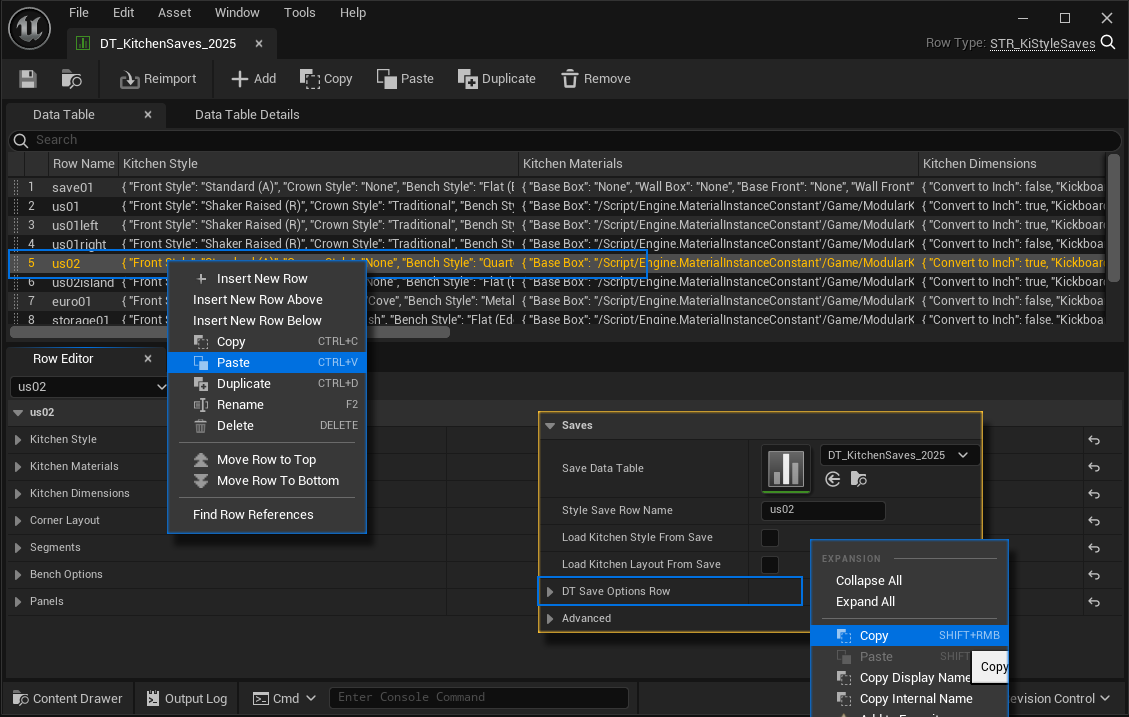
Save Option Row
All settings of a kitchen are always stored in a big variable named Save Option Row.
This variable can be copy / pasted into a data table row, being saved there with the data table.
Make a copy of the data table before you update the Modular Kitchen Builder to a new version. An update will revert all changes in the default data tables.
 Top of page