Table Of Content
New in 2026
Quick Guide
Video Guides
Getting Started
UI Design
Var Actor
Edit Scene
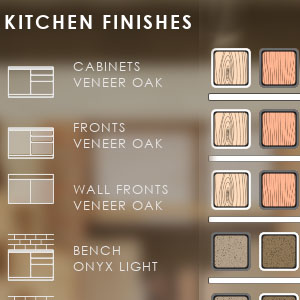
Designer
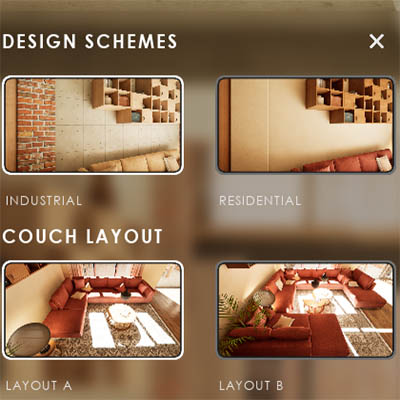
Feat. w. Preview
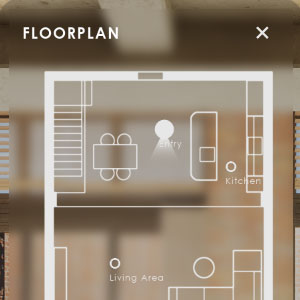
Other Features
Modes
Blueprints
Cost Reports
Multi-Unit-Prj
Google Sheets
FAQ & Tips
Fix Bugs
Updating
Version History
Non-Editing Features And Settings
All features and widgets that are not mentioned in the Editing section.
Scene and App Settings are driven by Settings Features and their sliders. The slider defaults are set when the app starts.
Content:
 Documentation Archive 2025
Floorplan Widget
Drawings
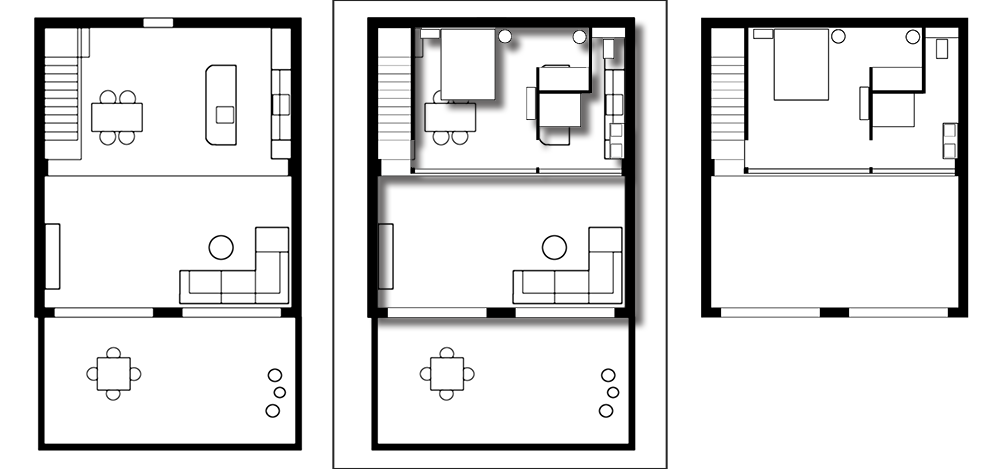
The drawings should be black on a white background. The UI will blend it into the UI Color Scheme.
Multiple Floors
The Paper size of the drawings need to be the same for all floors. They need to be placed with the walls aligned. They can't be offset in UI3.
Import Settings
Import the drawing from *.png. Use a size roughly twice the pixels of your monitor resolution.
Set all textures only used in the UI to Texture Group: UI and Compression Settings: UserInterface.
Info Map Settings
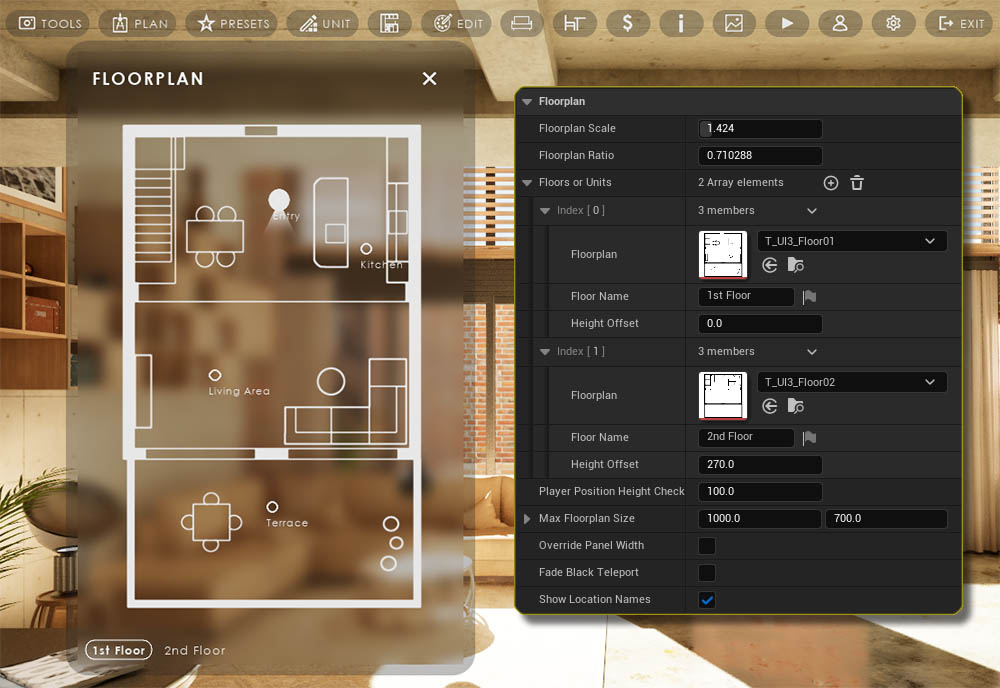
Add an array element to Floorplan or Units for each floor. Start with the lowest floor in the building.
- Floorplan - the imported drawing
- Floor Name - will be used for the buttons
- Height Offset - start with 0.0 for the lowest floor. Set the height offset from the lowest floor to any other floors.
Other Settings
- Max Floorplan Size - limits the size in the widget
- Override Panel Width - allows the widget to be larger than the standard widgets.
- Fade Black Teleport fades the screen while moving the player (use in VR).
Floorplan Scale and Alignment
Use the location and rotation of the Transform for the Info Map blueprint to align the drawing to the geometry.
Use Floorplan Scale to scale the drawing. You can't scale the blueprint.
The drawings need to be aligned to the building for the player position in the widget to be correct.
The Info Map can be selected by clicking the white lines or by clicking the blueprint billboard.
 UI3 Location Actor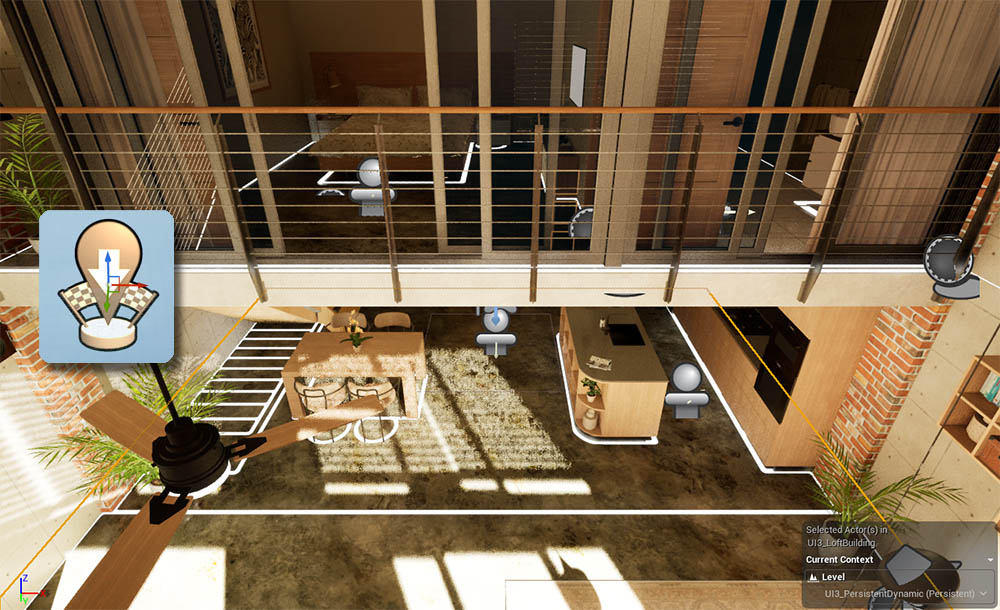
Unit Info
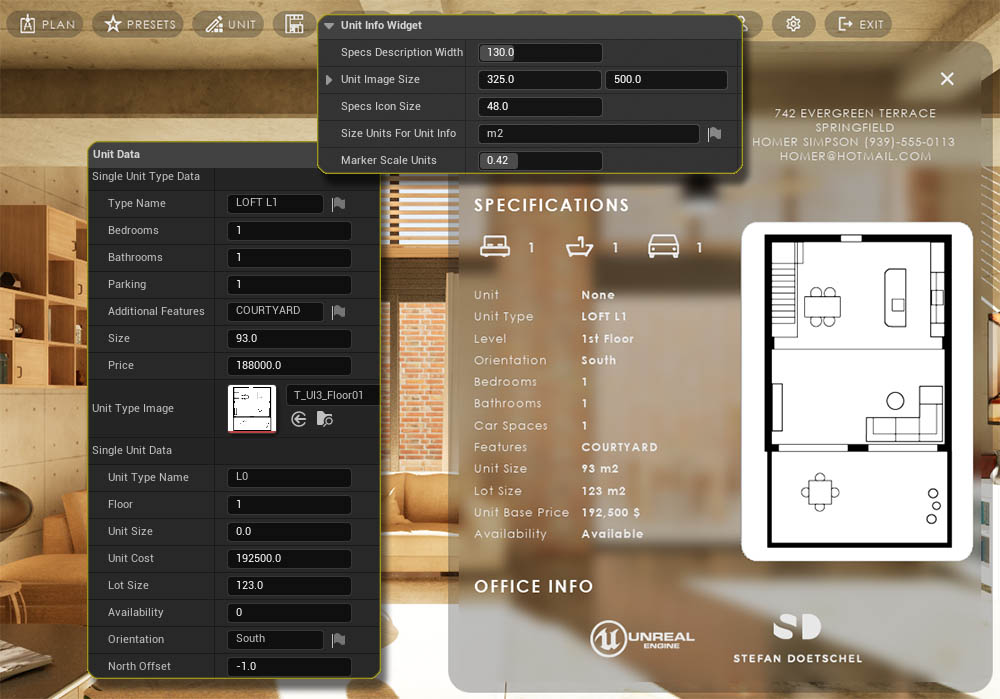
The widget displays a small Unit Drawing with the list of specifications next to it.
Info Map Settings
- Specs Description Width - Size of the text columns
- Unit Image Size - Max image size
- Specs Icon - Size can be set here. Icons can be replaced in UI Panel Design / Advanced / Icons Data
- Description Text - Can be modified in UI Text Format / UI Text Data
Unit Data
Scroll down to Single Unit (Type) Data to modify the information that is displayed in the widget.
This widget was originally meant to be used for multi unit projects. Read more about this in the link below.
Project Info and Media
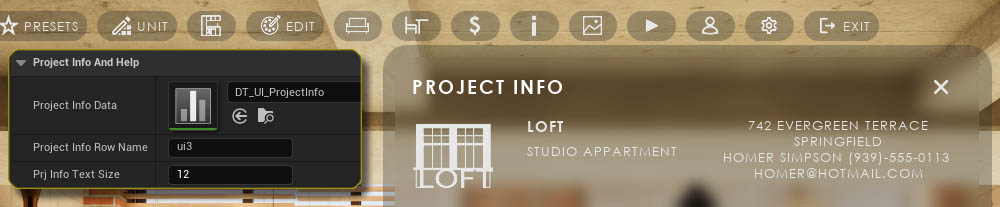
Info Map Settings
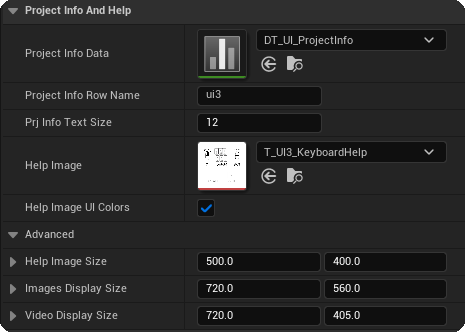
- Project Info Data - The data table assigned here contains all marketing information for the project
- Project Info Row Name - The row name where the data is taken from (by default ui3 is the only row)
- Prj Info Text Size - The text size of the contact information
Project Info
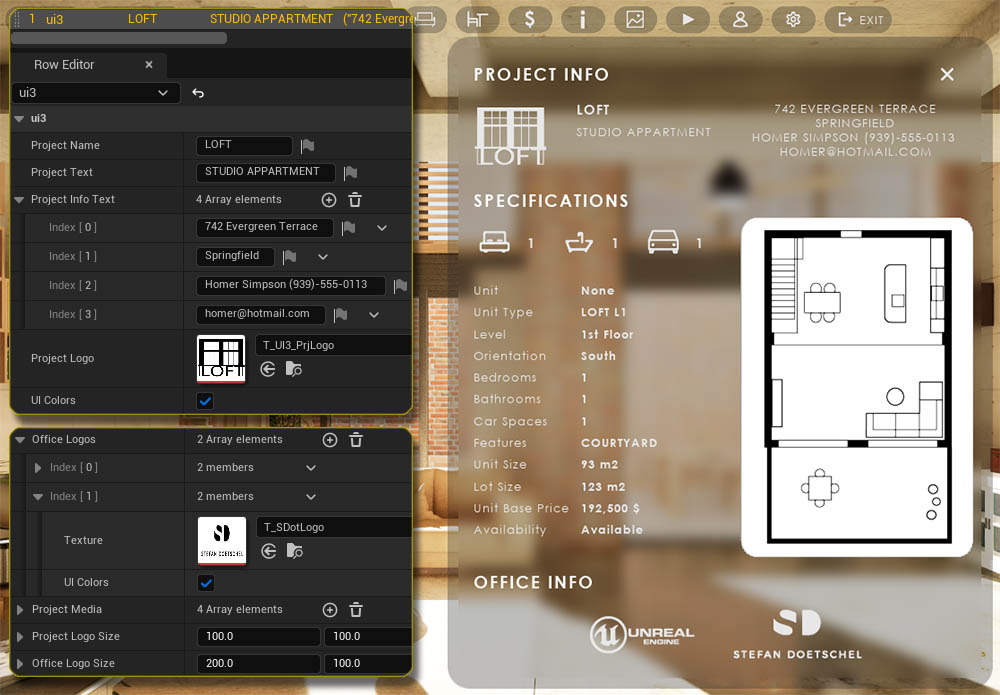
A small widget displaying basic information about the project.
- Project Name and Text - Public project name
- Project Info Text - Can be used for contact information or similar
- Project Logo - An icon for the project
- UI Colors - Use UI Color Scheme to blend into the UI
Office Info
This section allows some company logos to be displayed. The images are displayed in a ratio of 2:1.
Logo Sizes
Defines the size for the Project and Office logos.
Project Media
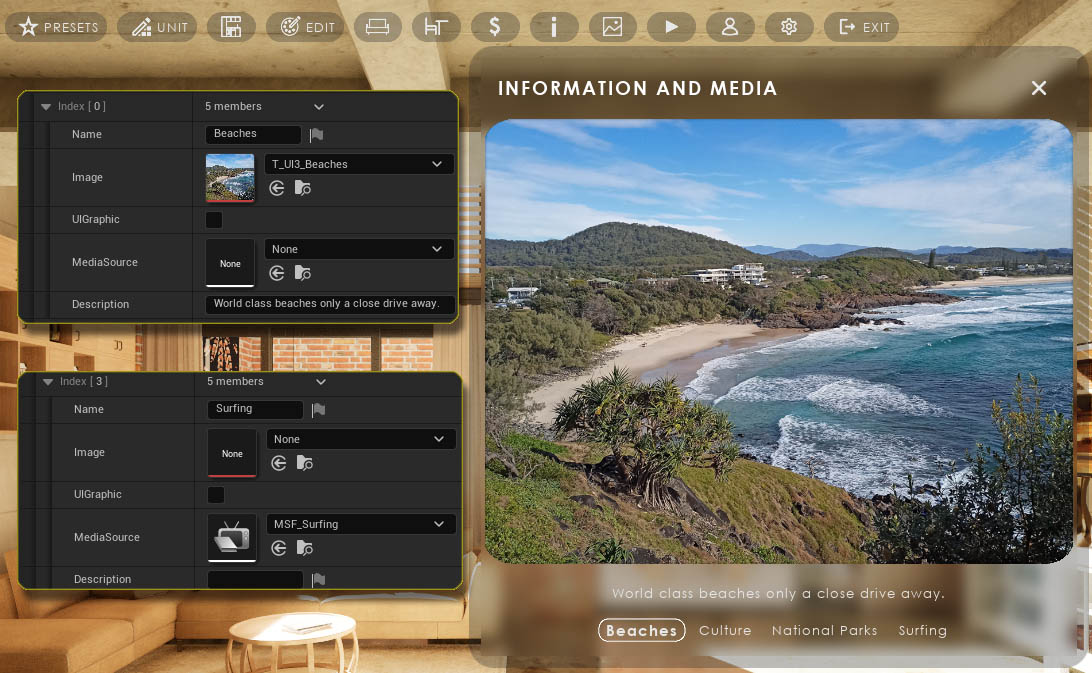
Elements in this array can either be an image or a video with short descriptive text. The Image will be ignored if a Video (Media Player) has been added.
- Name - The button name
- UIGraphic - The image will be blended using the UI Color Scheme. Only works with black on white images.
- Description - A line of text displayed under the image or video.
Controller and Button Help
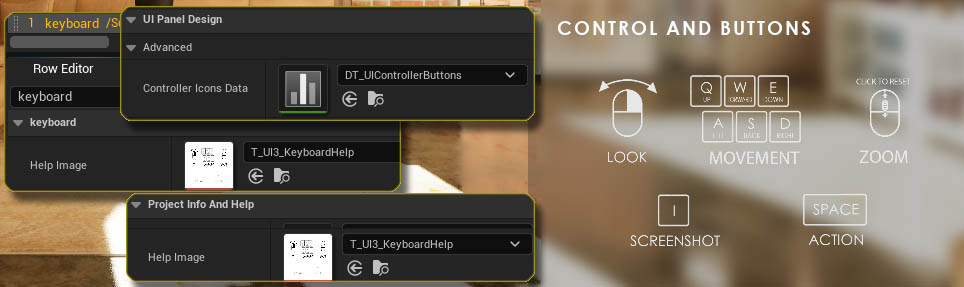
The Help Image will be set when choosing a Use Preset in the General Settings of the Info Map. It can be manually changed here.
Image Sizes
Image sizes can be set in the Project Info And Help - Advanced section.
The sizes are maximum sizes for both height and width. The actual size displayed is also limited by the Max Panel Size.
Help Image Source
The images for the control and button help are stored with the Controller Icons Data table.
A custom image can be used if desired.
User Manager and Save Slots
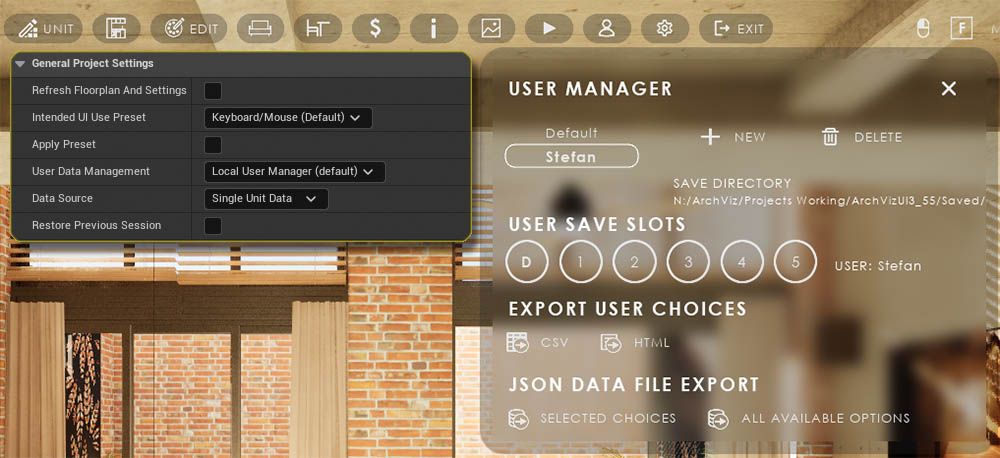
General Settings
- User Data Management should be Local User Manager (default) when using the User Manager Widget
- Data Source should be Single Unit Data for standard projects.
Restore Previous Session
- Sets the current user to the last active user.
- Loads the last active save slot for that user.
User Manager Widget
Users can be Added or Deleted. The save game files will remain on disk when a user is deleted.
User Save Slots
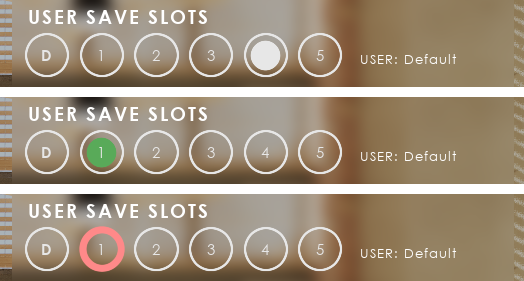
This widget provides 5 save slots for each user. The first Slot contains the default choices for the scene and can only be loaded and not saved.
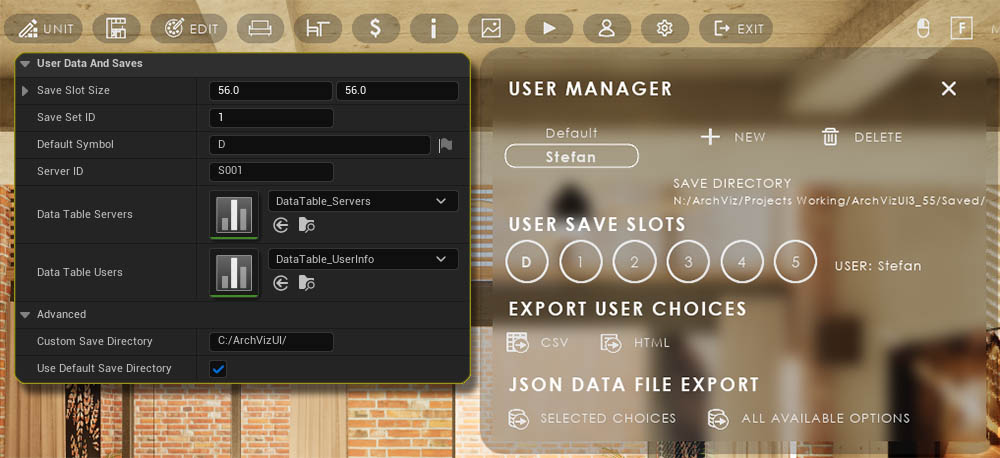
Save Set ID
Save game files are saved in the following format: User SaveSetID SlotID . sav
Example: Stefan14.sav is the save for set 1, slot 4, for user Stefan.
Save Location
Save slots are saved in MyProject / Saves / SaveGames by default or optional in a custom directory.
Save Slot State
- A white dot indicates an empty slot.
- A green dot indicates a slot that contains a save.
- Clicking the red ring will save (override) the current choices to the slot.
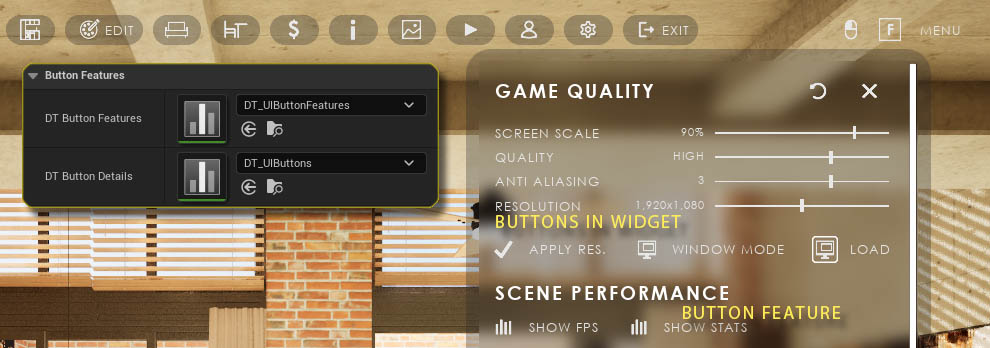
Buttons and Button Features
Button Features DataThere are two data tables that hold the data for buttons and their features
- DT Button Features - this data table is the source for all Button Widgets.
- DT Button Details - this data table is where all buttons are defined.
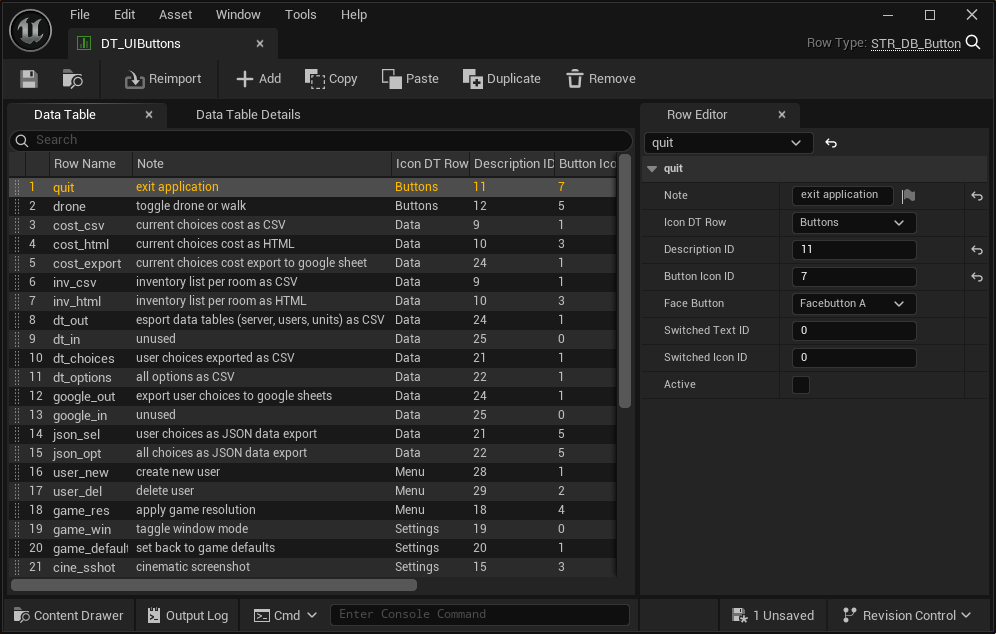
DT Button Details
Every Icon Button in the UI has an entry here. The Row Name is the identifier of the button within the UI.
Button Appearance
- Icon DT Row - the row name of the Icons Data table (UI Panel Design - Advanced)
- Button Icon ID - the ID of the Icon
- Description ID - the ID of the button text (UI Text Format - UI Text *)
- Switched * ID - appearance when the button has been switched on
- Face Button - Gamepad button
- Active - If the button is marked as in focus
This is just information for you do understand how buttons are created. You don't have to change anything here.
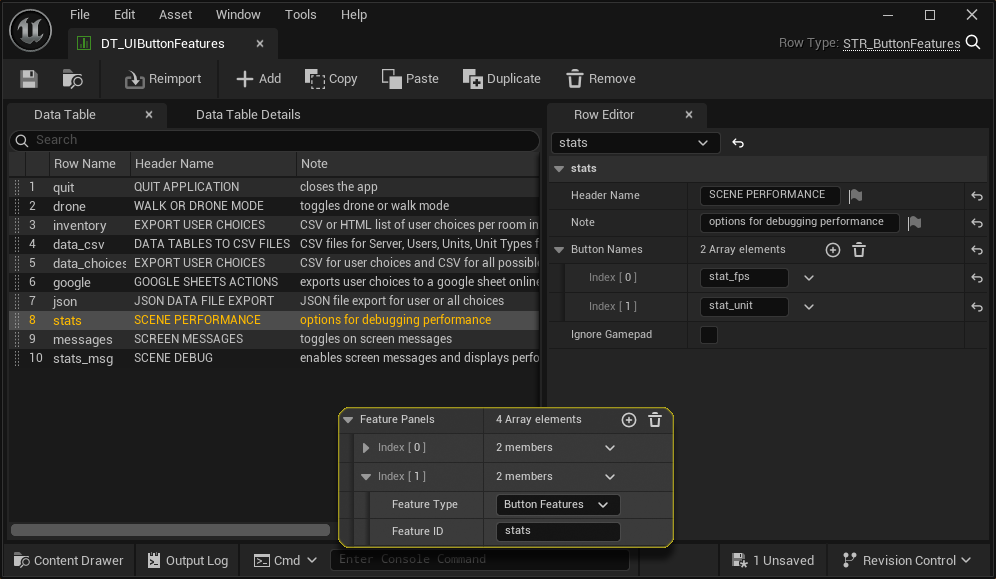
DT Button Features
Button Feature are created from a row in the DT UIButton Features data table.
Button Feature Settings
- Header Name is displayed as header in the UI widget
- Button Names each array element is a button created from the Row Name from the DT Button Details data table.
Placing a Button Feature
- Feature Type is Button Features
- Feature ID is the Row Name
Custom Button Features can be created by adding a new row to the data table.
Settings and Sliders
Settings Groups Widgets
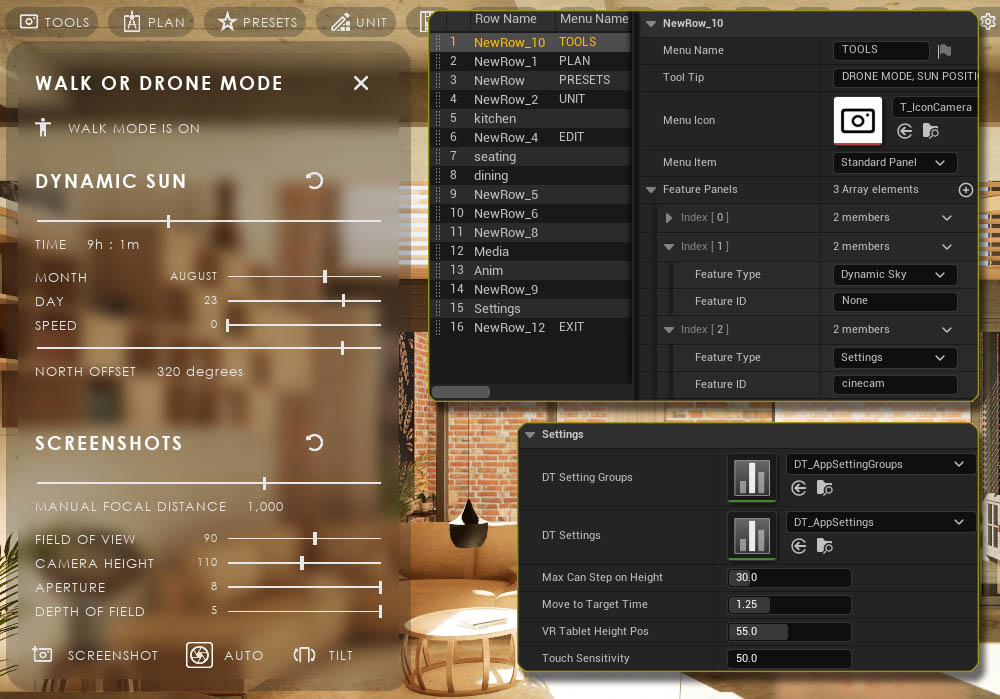
App Settings can be changed with sliders in Settings Groups during the walkthrough. These groups are stored in the DT Settings Groups data table.
Settings Groups are made from groups of Buttons and Sliders.
Sliders
All Sliders used in the UI are stored in the DT Settings data table.
Scene Settings
The Default Value can be loaded at app start. The UI loops through all sliders and applies the default value if Load Default is ticked.
The slider doesn't have to be used for the default value to be applied
.
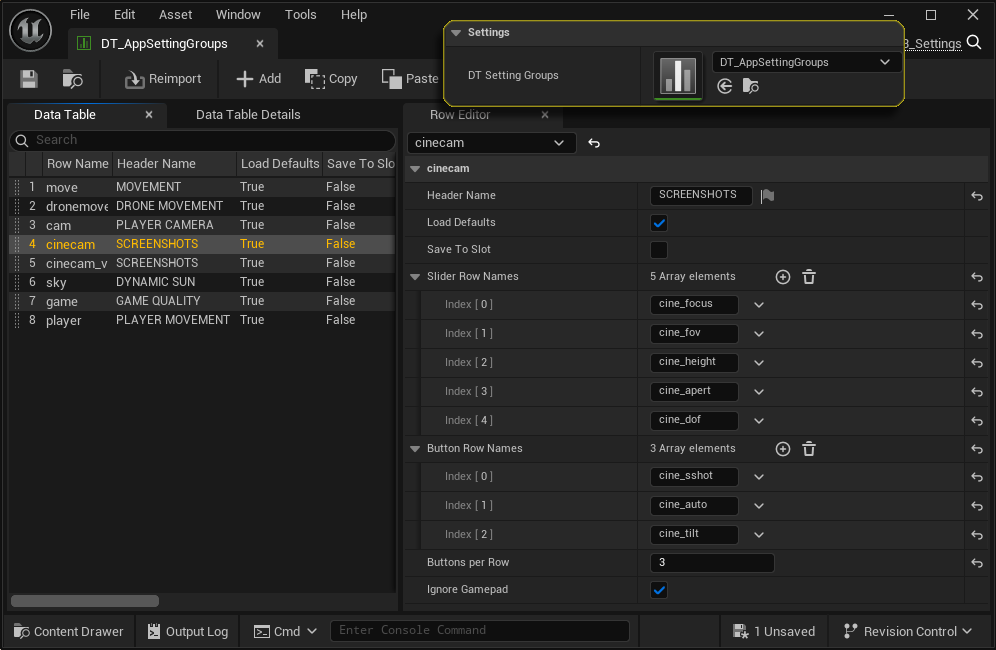
Setting Groups Datatable
- Header Name is displayed as widget header.
- Slider Row Name each array element will add a slider to the widget with the given Row Name.
- Button Row Name each array element will add a Button to the widget with the given Row Name.
- Buttons per Row max number of buttons displayed in a row (wip)
- Ignore Gamepad - (ticked by default) always uses button icon and never gamepad face button icon.
Adding a new row in this data table will create a custom Settings Group Widget.
Some often used Settings Groups Widgets can be placed as a Feature Type
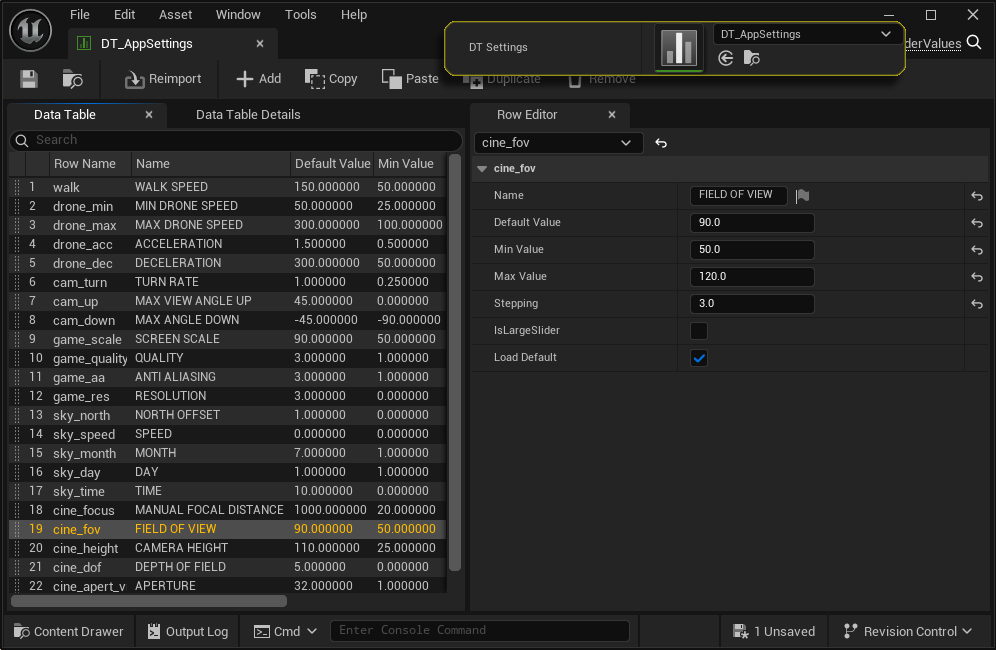
Slider Datatable
- Name the name of the slider.
- Default Value this value will be applied to the scene at app start if
Use Default is ticked. - Min Max Value defines the slider range.
- Stepping one step (+/- value) when using a game controller.
- is Large Slider The slider will span the entire widget width.
The slider is identified by the UI through the Row Name. This name can't be changed or the UI won't find the slider anymore.
.
 Top of page