Table Of Content
New in 2026
Quick Guide
Video Guides
Getting Started
UI Design
Var Actor
Edit Scene
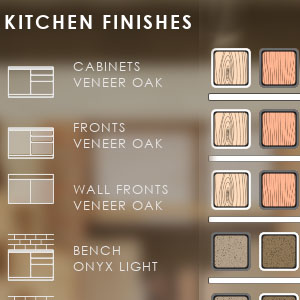
Designer
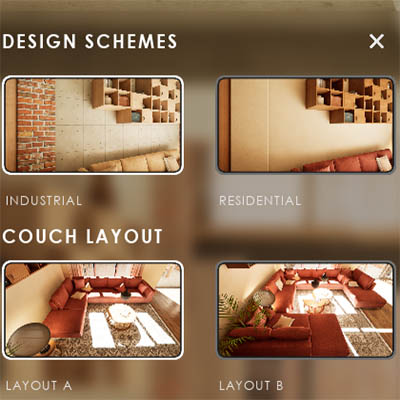
Feat. w. Preview
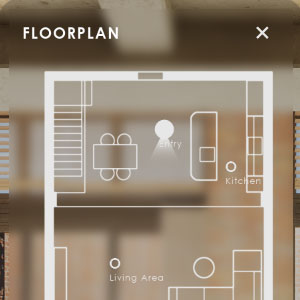
Other Features
Modes
Blueprints
Cost Reports
Multi-Unit-Prj
Google Sheets
FAQ & Tips
Fix Bugs
Updating
Version History
Frequently Asked Questions And Tips
Frequently Asked Questions for issues that are not bugs.
Tips for common tasks and how to properly use the UI3. How to connect to external plug-ins and more.
Content:
Multiple Couches and Tables in the Scene
 Documentation Archive
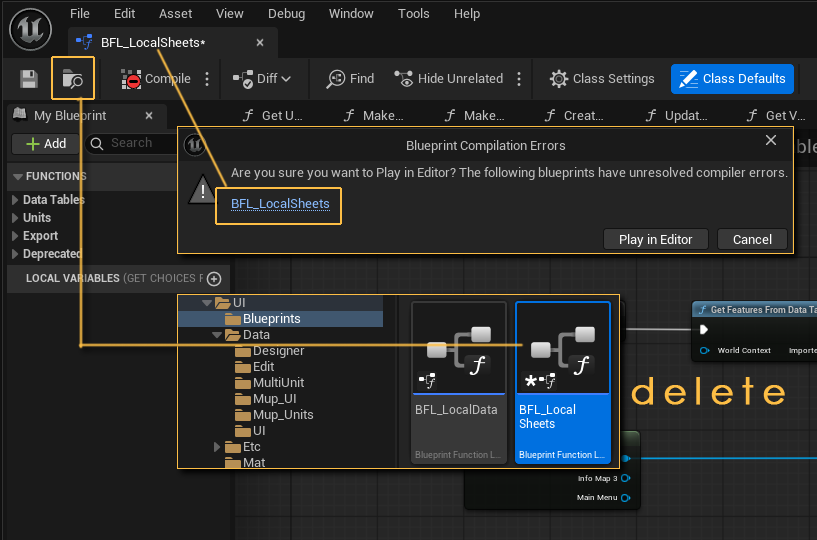
BFL_LocalSheets Error
You can ignore this error when playing in editor but this error will prevent the project from being packaged!
The new version doesn't have that file anymore. You can safely delete this file if you updated your project from a previous version to avoid this error.
Multiple Couches and Tables in the Scene
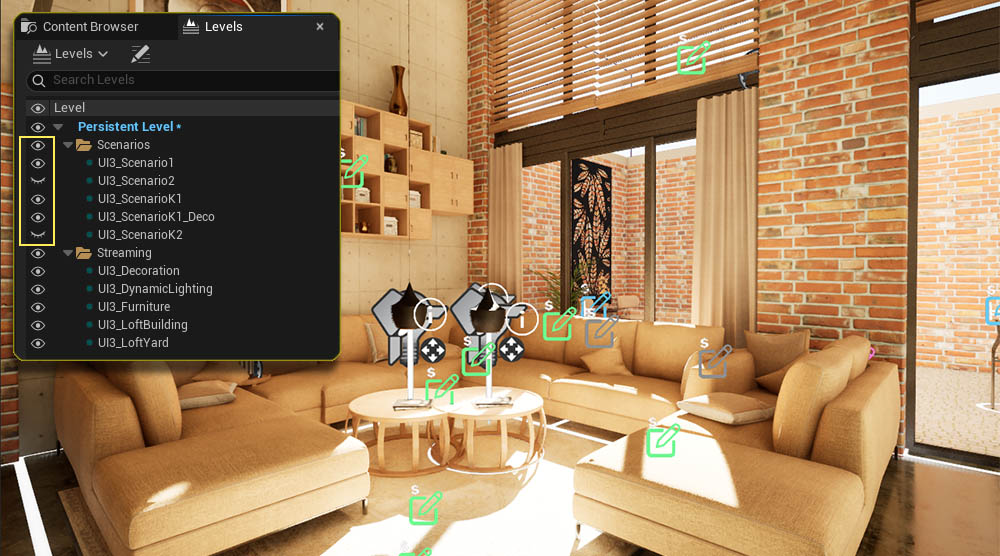
There might be multiple couches and tables in the living room area of the project. Unfortunately there are multiple scenarios active in the 2026-07 version.
- Open the Level Browser
- Check the levels in the Scenarios folders
- Hide the level UI3_Scenario2 by clicking the eye icon.
Packaging Failed
Visual Studio Version
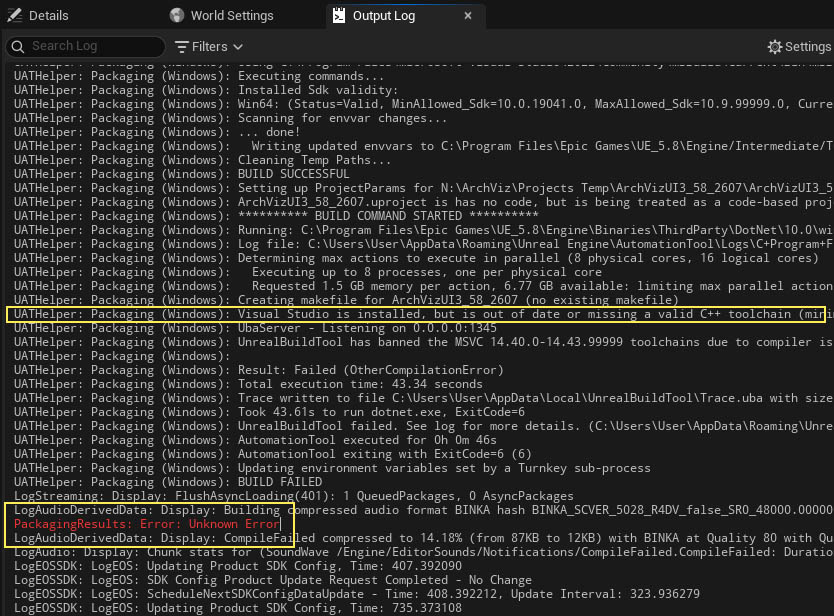
In case the packaging fails within a minute or so. Open the Output Log and search for the Packaging Result: Error (Unknown Error).
Then look upwards for any Visual Studio messages like this:
UATHelper: Packaging (Windows): Visual Studio is installed, but is out of date or missing a valid C++ toolchain (minimum version 14.38.33130, preferred version 14.50.35717). Please update Visual Studio to 17.8 or later and verify that the "MSVC Build Tools v14.50 for x64/x86" component is selected in the Visual Studio installation options.
This message should tell you which Visual Studio version needs to be intalled.
It can take very long when packaging for the first time. It will go much faster when re-packaging again later.
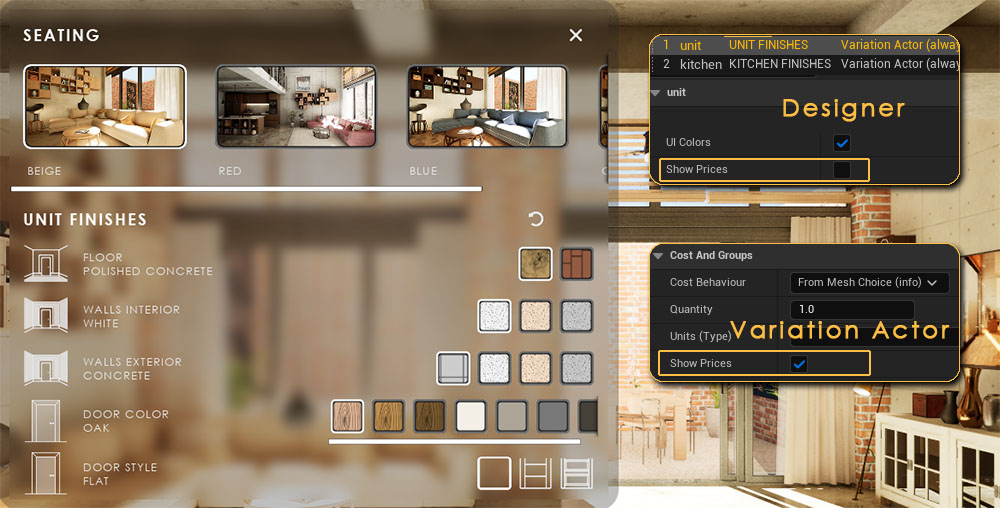
Can I hide the prices everywhere?
General Settings
There is a tick box to disable cost tracking in the general settings.
You can also disable prices in individual widget and blueprint settings.
Designers
Disable the tick box Show Prices in the Designer Data Table for the designer you which to hide the prices from.
Variation Actor
Disable the tick box in Cost And Groups to hide prices in Edit Mode
Ultra Dynamic Sky
Introduction
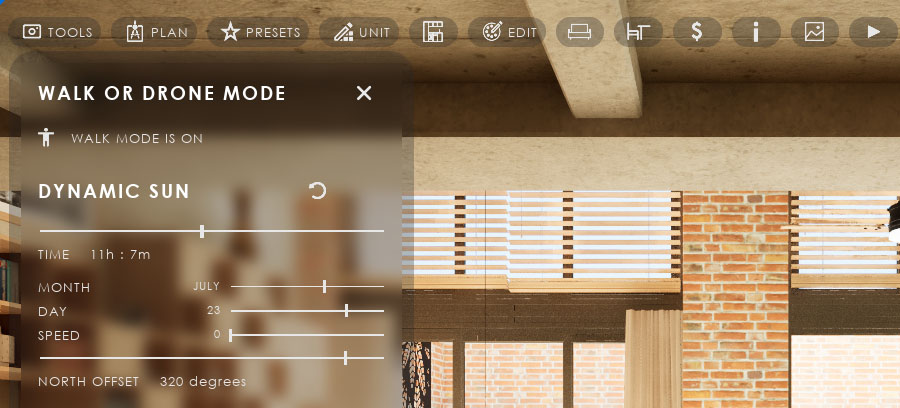
UI3 supports the use of the Ultra Dynamic Sky system. No change is needed if you only want to use it to light your scene. It can be placed as in any other scene.
It can replace the Sun Positioning actor and the time can be set from within the UI.
Enable the Sun Positioning plug-in from Epic Games even if you don't plan to use it!
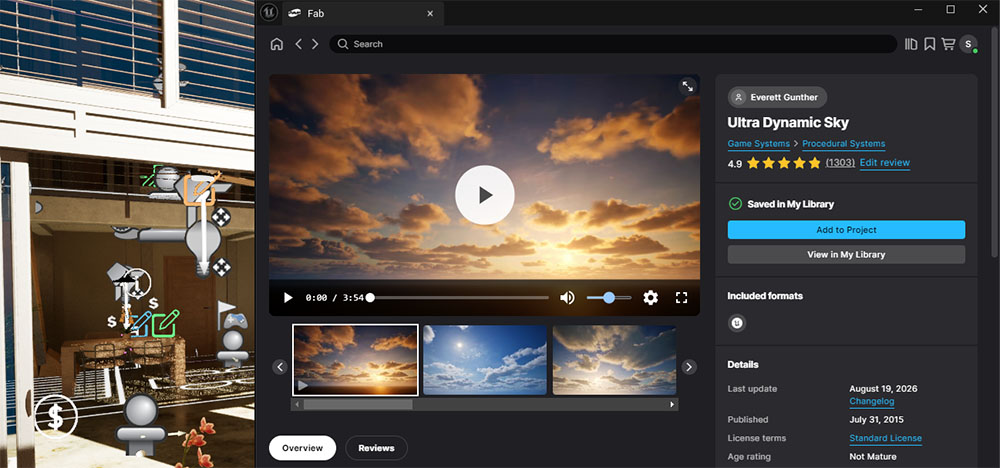
Add UDS to the project
Open the FAB plugin from the Window main menu tab. Search for the Ultra Dynamic Sky games system and add it to the project by clicking the big blue button.
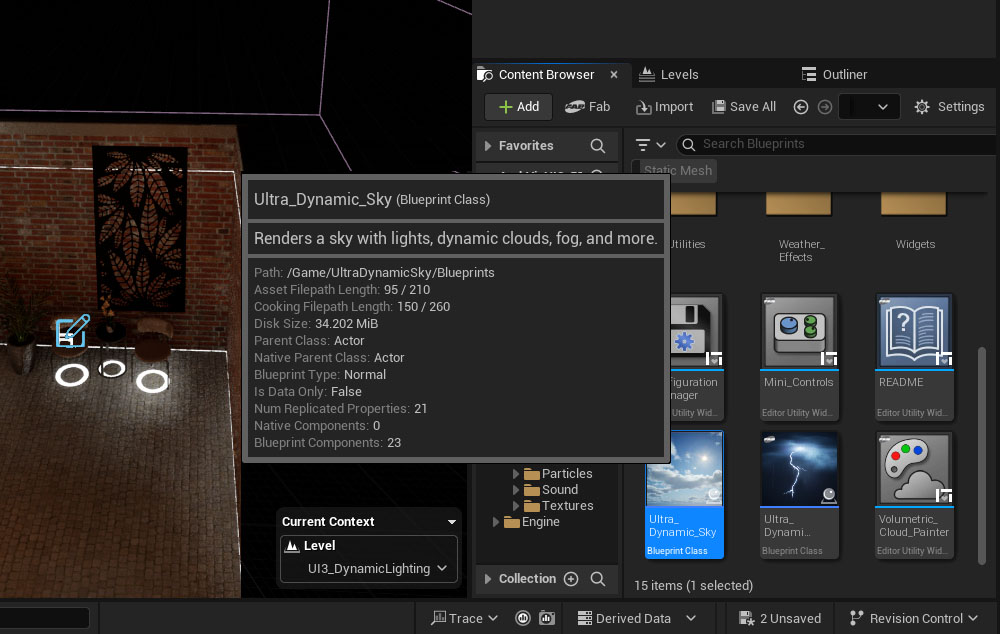
Replace the Sky Actors
Delete the following actors from the scene so the level is entirely black:
- Directional or Sky Lights
- Sun Sky Positioning blueprint
- Sky Sphere
- Volumetric Clouds
- Fog
Then add the Ultra Dynamic Sky blueprint to the level called UI3_DynamicLighting or any other level in your project.
Activate the UI blueprint library
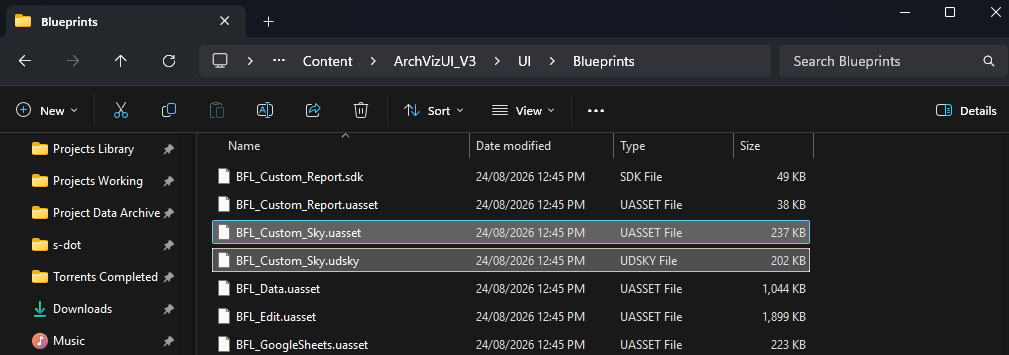
Close the Unreal Editor and navigate to the folder
>> MyProject / Content / ArchVizUI_V3 / UI / Blueprints
Most newer versions have two files that need to be renamed:
- Rename the file BFL_Custom_Sky.uasset to BFL_Custom_Sky.old
- Rename the file BFL_Custom_Sky.udsky to BFL_Custom_Sky.uasset
Older versions have a different naming, like BFL_Custom but the renaming process is the same.
Version 2026-07.1 blueprint errors: Use the link below to get the BLF_Custom_Sky library and replace the existing file (ignore the *.udsky file).
UDS Settings
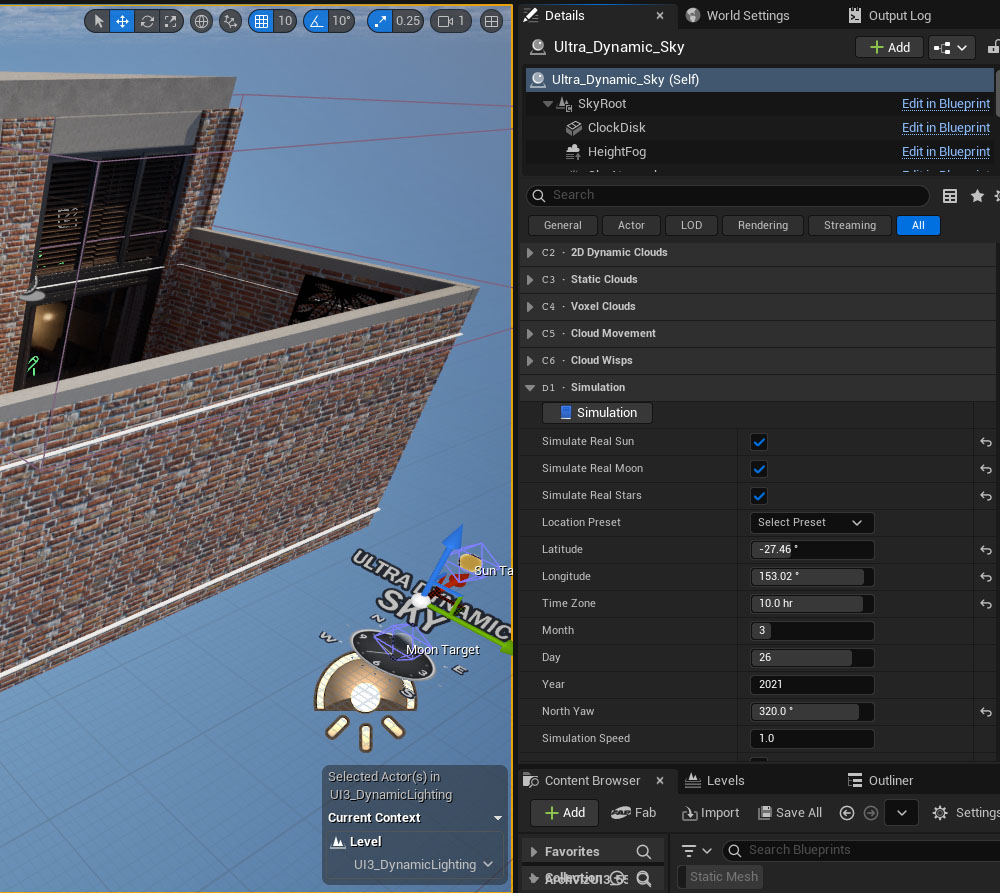
Browse down to D1 - Simulation
Select what you want to be simulated
- Simulate Real Sun - Required
- Simulate Real Moon - Recommended
- Simulate Real Stars - This can be expensive and may stop the sun loop from working
Set the Location Preset or enter the location data manually.
Set the default time and date.
Set the North Yaw which adjusts the north direction. It's usually the relative direction of the north arrow on the building drawings.
This is the process for the current UI3 version and UDS versions as of August 2026. UDS settings may change. I'll try to keep this up to date but I don't always know if UDS has changed.
Sun Loop not working
The sun loop may not start in some engine versions.
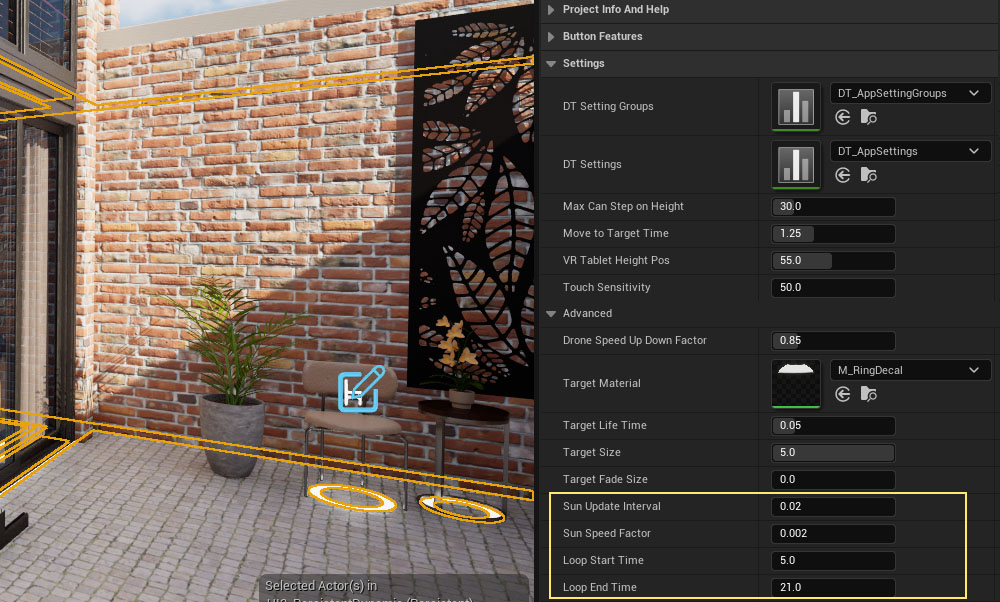
UI3 manually sets the time and sun position a bit ahead with every few frames. The time it waits between each steps can be set with the Sun Update Interval in the Settings - Advanced section of the info map.
The default value is 0.02 which is a value related to the tick delta. You can try to set this value to 0.00 which works for UE 5.7 as I was told.
The tick event happens at the beginning of every frame. The best working value could be different and depends on the PC and the scene performance.
Create Printable Lists
Reports in UI3
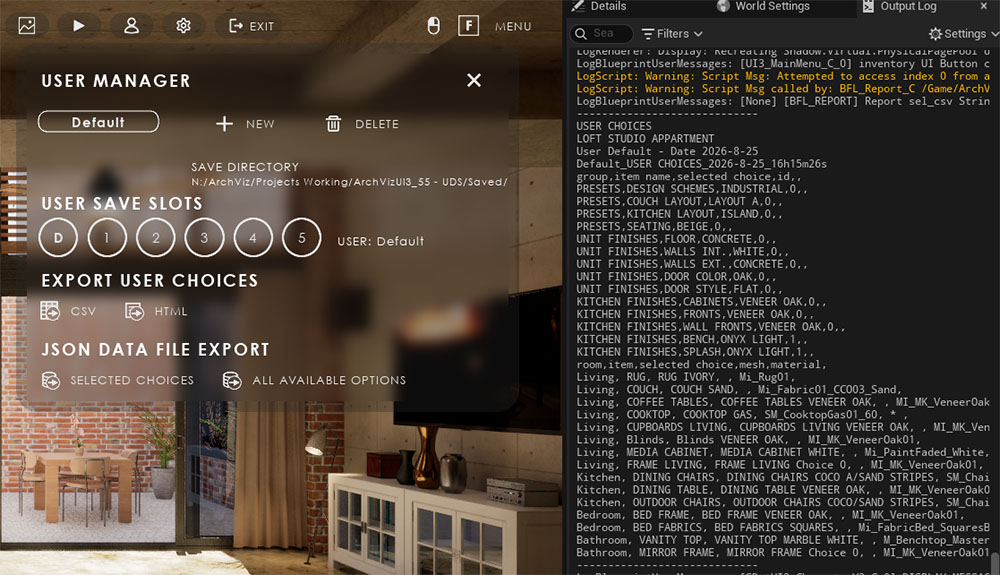
UI3 can create reports for Cost Tracking or inventory lists reflecting the choices the user has made in the scene.
These reports appear in the Output Log but they can also saved to disk with a free plugin.
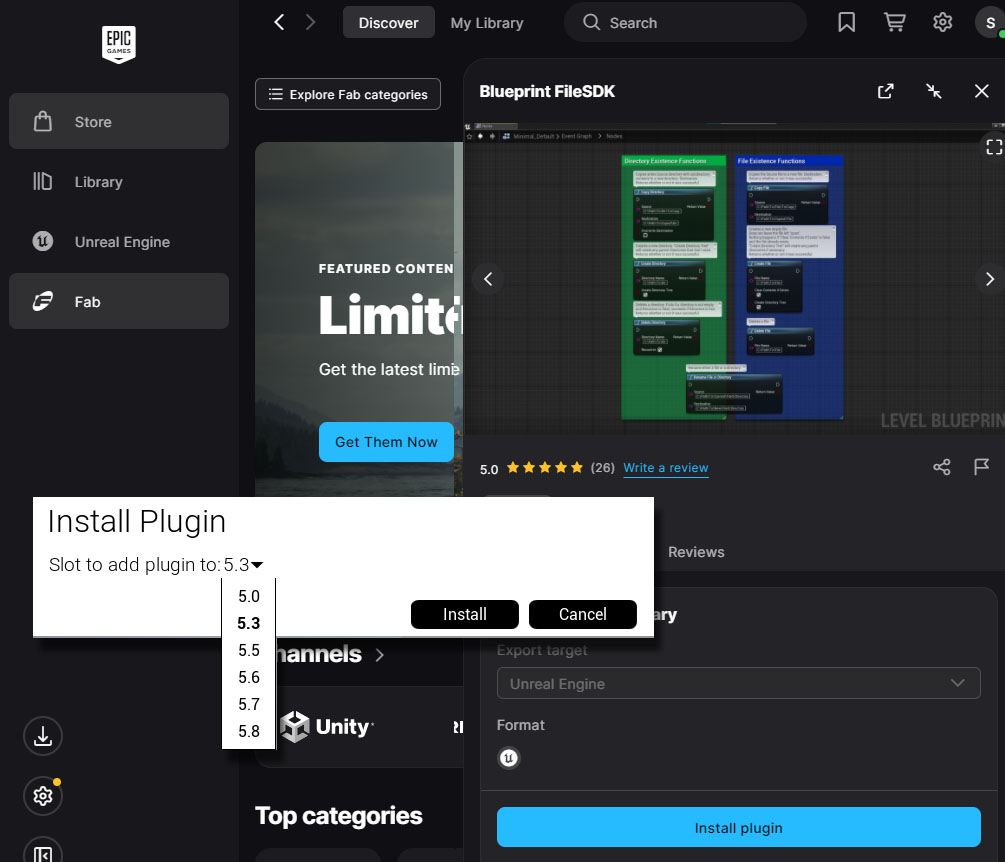
Install Blueprint FileSDK
The plugin is free but you need to get it from FAB and then install it to the engine versions you want it to be used in.
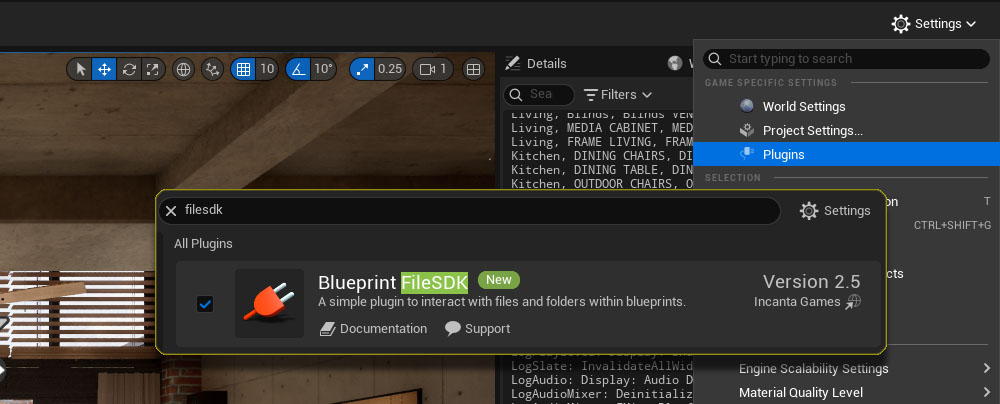
Activate the FileSDK plugin
Then back in the project it needs to be activated in the Plugins settings.
The place to find the plugins differs from version to version.
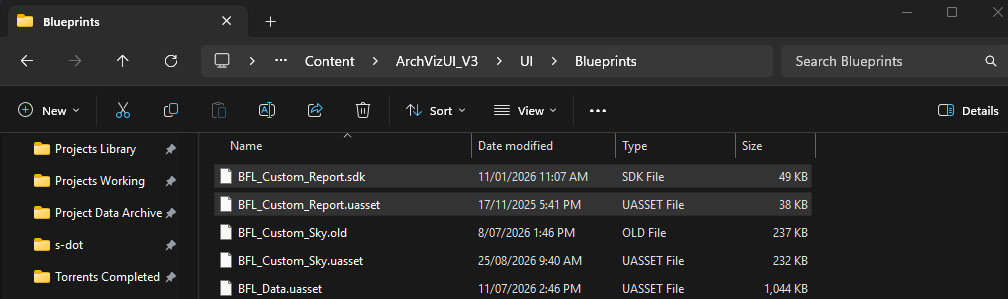
Activate the necessary blueprint library
As a last step the blueprint library needs to be activated.
Close the editor and browse to the folder
>> MyProject / Content / ArchVizUI_V3 / UI / Blueprints
There are 2 files near the top of the list. They need to be renamed:
- Rename BFL_Custom_Report.uasset to BFL_Custom_Report.old
- Rename BFL_Custom_Report.sdk to BFL_Custom_Report.uasset
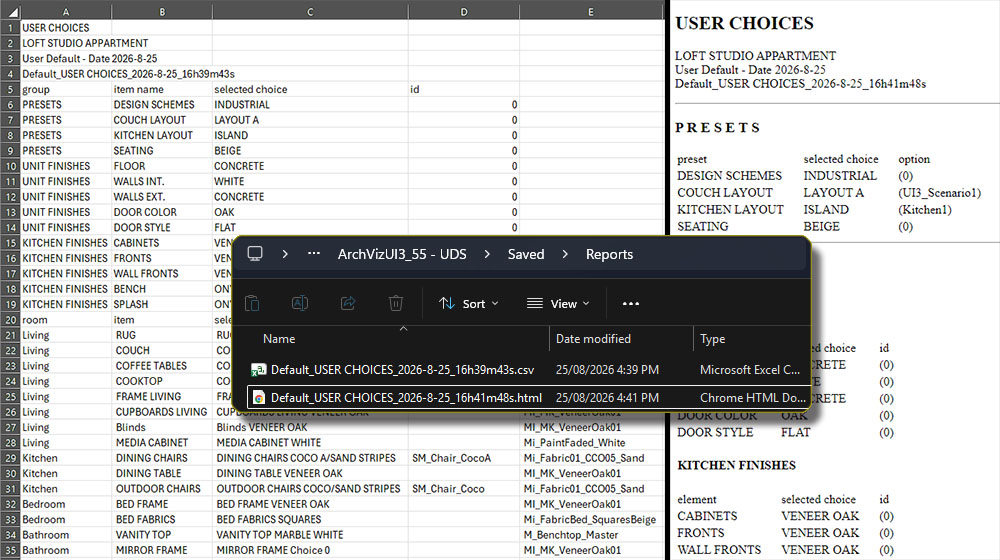
Create Files
Files will be saved to the Save Directory set in the Info Map. By
default the directory is
>> MyProject / Saved / Reports
The files will be saved with the user, time, and date in the file name.
Take a screenshot if the files are not getting saved. Taking a screenshot will somehow allow the project to create files. It may take a long time to take the first screenshot but it should be fast afterwards.
Create A Custom Button
Requires Some Blueprint Knowledge.
Create a Button
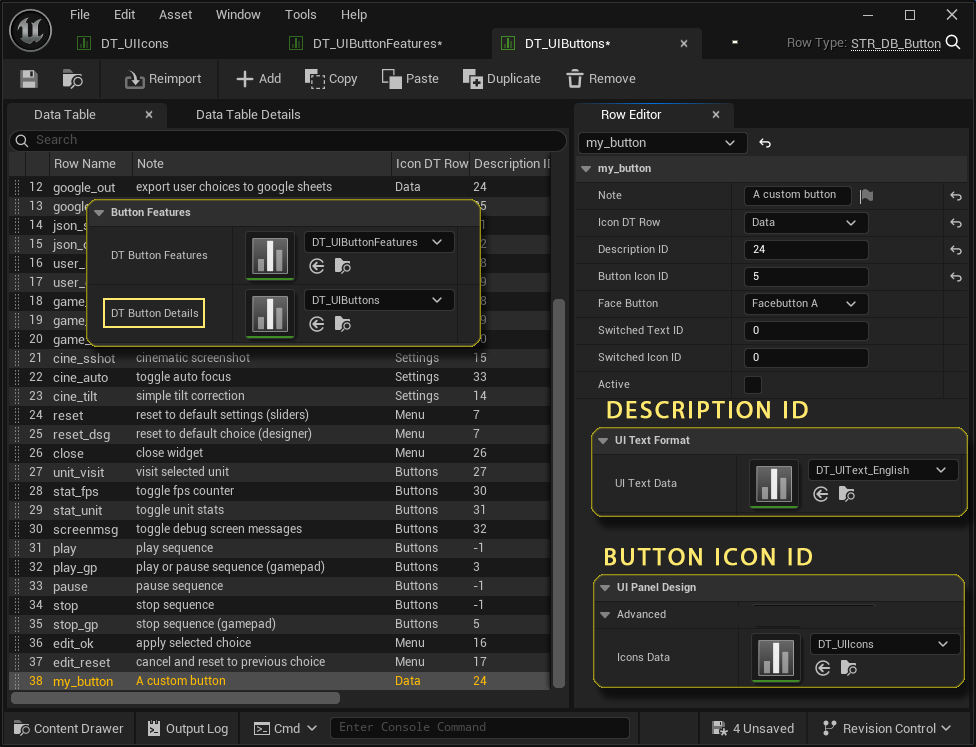
Add a row to the buttons data table that you can find in the Info Map in the Button Features section.
The Row Name is used to identify the button.
The Description ID points to the ID of a name in the UI Text Data data table which can be found in the Info Map.
The Icon ID Row and the Button Icon ID define which icon to use in the Button Data data table which can be found in the Info Map.
In this example I used the data export icon.
You can add a row to the text or icon data table and add your own text or icon.
Create a Button Widget
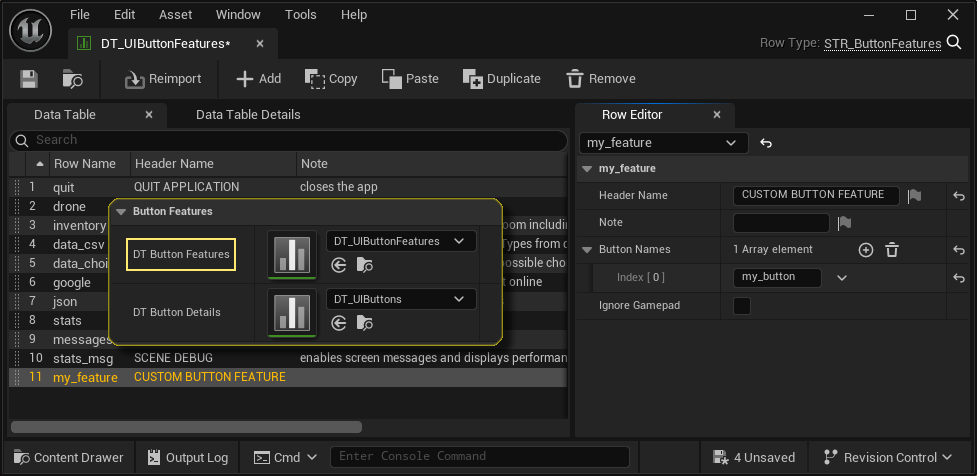
Add a row to the Button Features data table that you can find in the Info Map in the Button Features section.
Add a Header Name that describes the button feature.
Add an element to the Button Names array for each button that you want to be on the feature widget.
Add the Widget to the Menu
Add the new widget as Button Feature to the layout.
Feature ID is the Row Name that you added to the button features data table.
 Other Features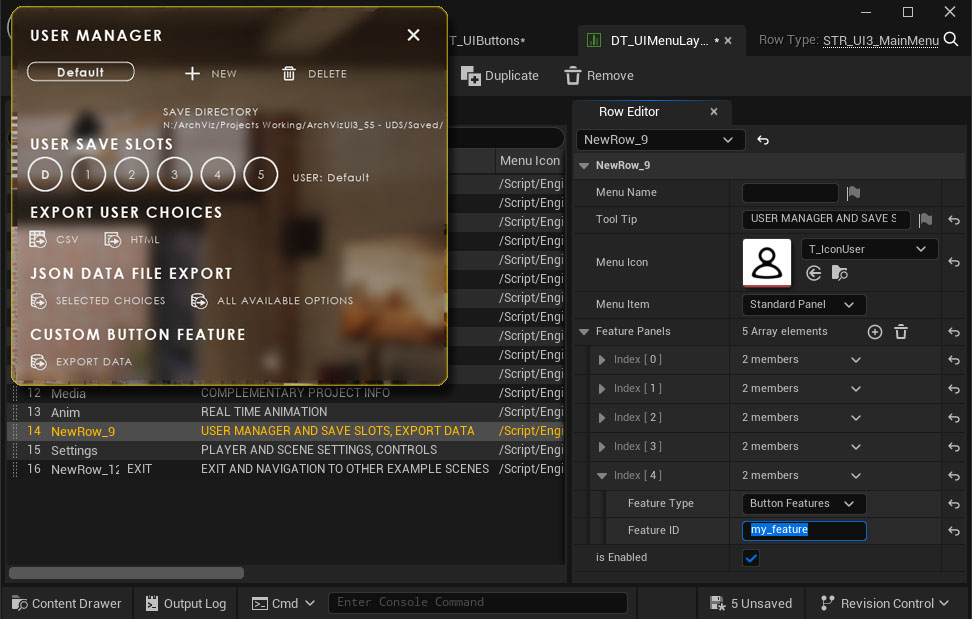
Button Action
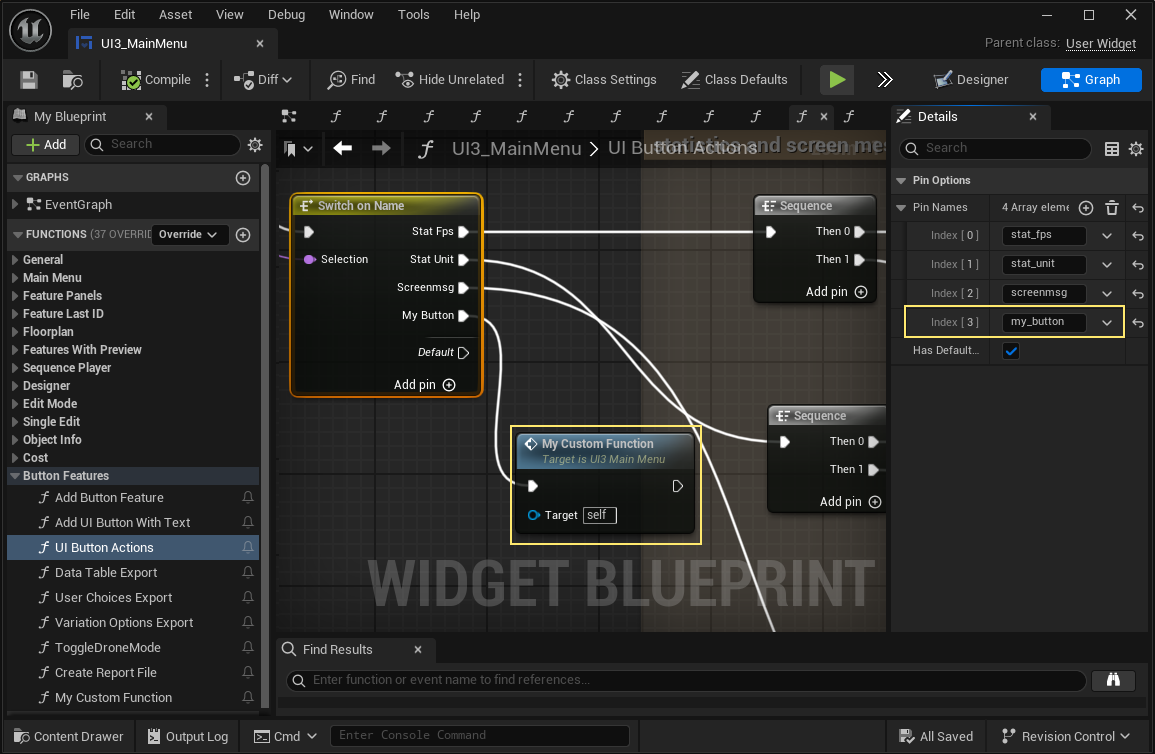
Open the Main Menu widget and switch to the graph.
- Open the function UI Button Actions (Button Features).
- Scroll down to the last Switch On Name node.
- Click on Add pin.
- Double click the node to open the list of pins.
- Rename the new pin to the Row Name of the new button you added to the data table.
- Create a new function, place it into the graph and add it to the new pin.
Now you can add your actions to the new function and they will be triggered when the button is clicked.
Add a Custom Slider
Adding a new slider works the same way as adding a new button (explained above).
Create a Slider
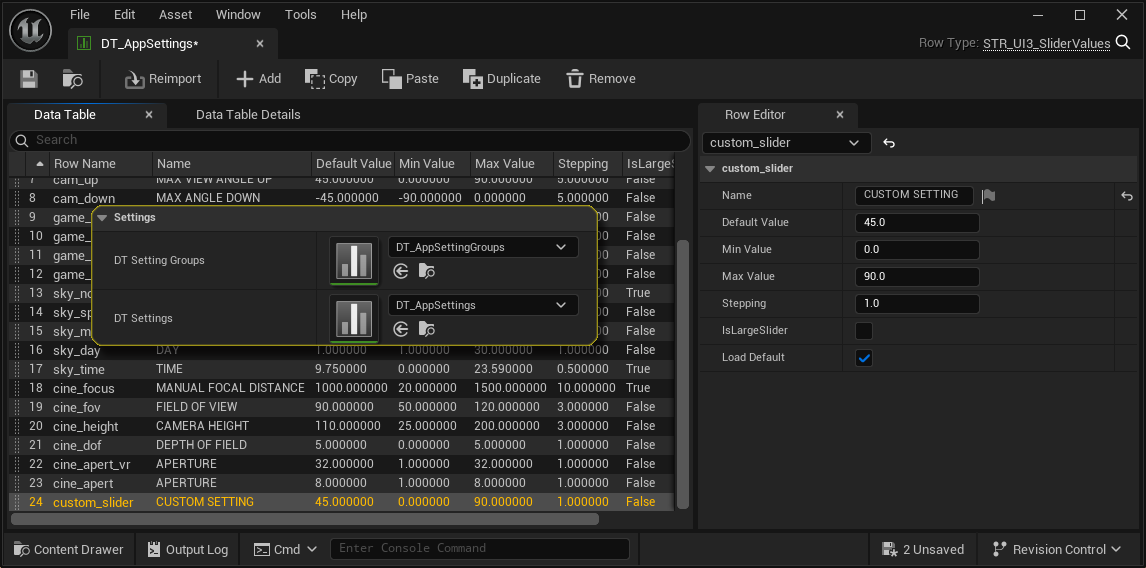
Add a new row to the data table assigned to DT_Settings in the Info Maps / Settings section.
The Row Name identifies the slider and needs to be unique. More info about sliders and their settings can be found following the link below.
Create a Slider Widget
The slider can be added to an existing Settings Widgets, or you can create a new widget for it.
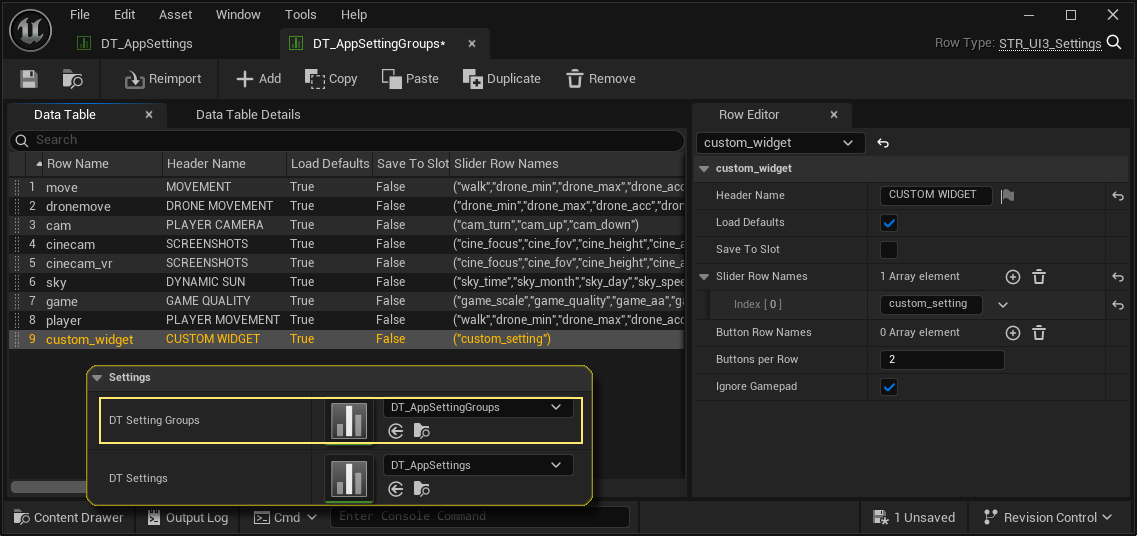
Settings are defined in the data table assigned to DT_Settings_Groups in the Info Map / Settings. Each row represents a widget that can contain sliders and buttons.
A new slider group widget was created in the example image.
Slider Action
Slider Actions are set in the SDot_UI3_CharacterV2
- Open the character blueprint
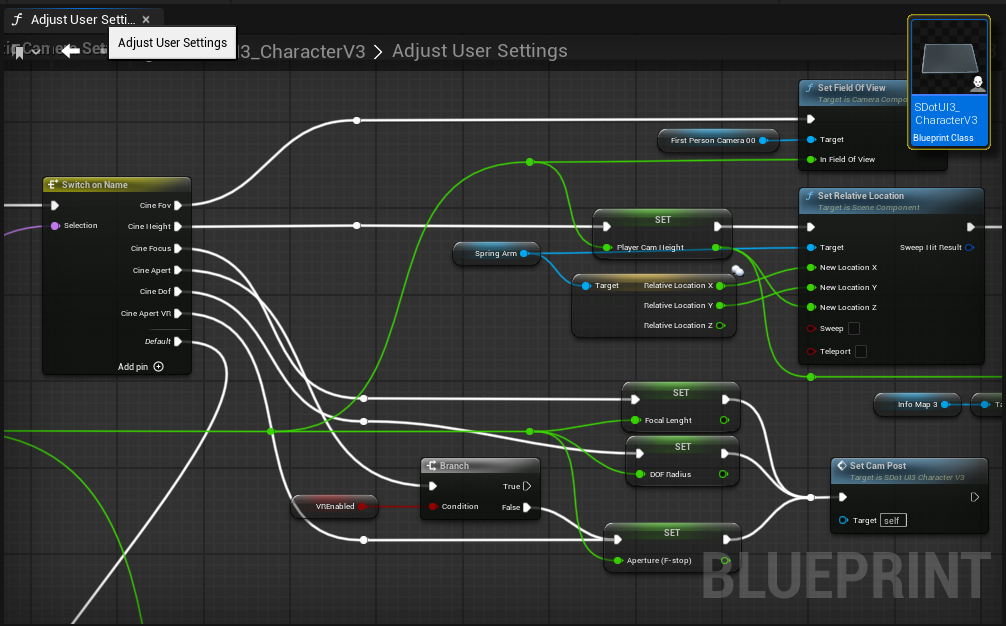
- Look for the function Adjust User Settings
- Pick one of the Switch On Name nodes and Add Pin (+)
- Double click the node and change the pin name to the slider's Row Name
- Create a new function for the sliders actions and connect it to the new pin create the nodes directly in the graph.
The slider will send the new value to the function when the user changes its position.
 Top of page