Pages in Documentation

Settings

UI3 Overview

[old] Doors UE5

Quick Start

Swap Actor

Custom Assets

System Drawings

Step by Step

Tips & FAQ

Settings

Multi-Unit-Prj

Google Data Sheets

Data Tables

Video Guides

Quick Videos

Designer

Cost Tracking

Widget Panels

Quick Guide
Scene Settings

Connect BP

VR projects

Version History

F. w. Preview
Fix Known Bugs
UI Settings

UI Layout

Gamemode

FAQ + TIPS

V4 Functions 2

V4 Functions P1

V4 Quick Guide

Ver History

V3 Placements

V3 Mesh Def.

V3 Segments

V3 Quick Start

Books V2

Books V1
Customize
Quick Guide

Swap Actor

FAQ + TIPS

Doors UE4 (V1)

3.1 Bugs Fixes

Ver History
![[2 A] Generic Meshes On Spline Blueprint ../images/architecture/0023/v2-generic/thumbs/01.jpg](../images/architecture/0023/v2-generic/thumbs/01.jpg)
V2 Generic BP
![[2 B] Generic Spline Blueprint Examples ../images/architecture/0023/v2-examples/thumbs/01.jpg](../images/architecture/0023/v2-examples/thumbs/01.jpg)
V2 Examples
![[1] Railings Clone Blueprint Documentation ../images/architecture/0023/v1/thumbs/01.jpg](../images/architecture/0023/v1/thumbs/01.jpg)
V1 Railings Fences

UI 1 - Part 1

UI 1

Ui 1 - Part 2

1 Overview

UI2 Features

UI2 Get Started

UI2 Info Map

UI2 BP Actors

UI2 User Manager

UI2 FAQ

UI2 Tutorials

UI3 Overview

Getting Started

3.1 Info Map

Variation Actor

Blueprints
Getting Started With UI3
How to get started with the UI3 in your own project:
Purchase, Installation of the Demo Project, and Migration to your project.
Content:
Get UI3 from Epics Marketplace, Versions
Video Tutorial
The Video Tutorials show in detail how to create a project from the start. The series isn't quite up to date with the latest UI3 version.Video 1 and 2 are about creating a project and migrating the interface to it.
Get UI3 from Epics Marketplace, Versions
Purchase the UI3 from the Marketplace or FAB. The product will then appear in your Vault.Updates are free, and the project should be available in future Unreal Engine versions. Ownership will be transferred from Marketplace to FAB.

Make sure you are using the correct engine version. The source projects are created for
- Unreal Engine 4.26
- Unreal Engine 5.0
- Unreal Engine 5.3
Not every major engine version release requires to update the demo project. You can use the next lower version. For example 5.4 would be the same as 5.3, so no need to create a 5.4 version if you already have the 5.3 version installed.

Migrate the UI3 to your project
To use the UI3 you can- create new level(s) in the demo project
- migrate UI3 to your own project.
If you decide to migrate, you can migrate the folder
- ArchVizUI_V3, which contains the UI plus the demo scene
- UI within the ArchVizUI_3 folder which only contains the UI.
Right click the folder and choose to migrate. Select the Content folder in the target project.
Do not just copy the folder using the windows explorer!
Some selected assets don't have a corresponding
content root in the destination.
/SunPosition

Input Controls
The UI now uses Enhanced Input Method:- September 2024: all Unreal 5 versions
- June 2024: Unreal 5.3 and later
The input actions are in the folder ArchVizUI_V3/UI/Etc/Input.
You may have to enable Enhance input in older projects.
Project Settings / Input / Advanced / Class Defaults
In earlier version copy the file Config/DefaultInput.ini from the demo project to the Config folder of your new project. The input controls are stored in this file. An editor restart may be required.

Place a Player Start
Add a player start to the main (persistent) level of the scene, at the position where the player should start when the app starts.Place a Blocking Volume under the player start so the player doesn't fall through the floor in case the level geometry isn't loaded yet.

Project Settings
Many settings are already set through the project template you did choose when you created the project. You can make changes at any time later.You have to set a few things in the Project Settings depending on what kind of lighting you are going to use. Lumen would be the default choice for most projects.
Unreal has a very good online documentation. Be careful what you change in the project settings. You may crash the project next time you load it.
Settings are stored in the /Config folder of your project. You can reset everything by renaming that folder to /Config.old.

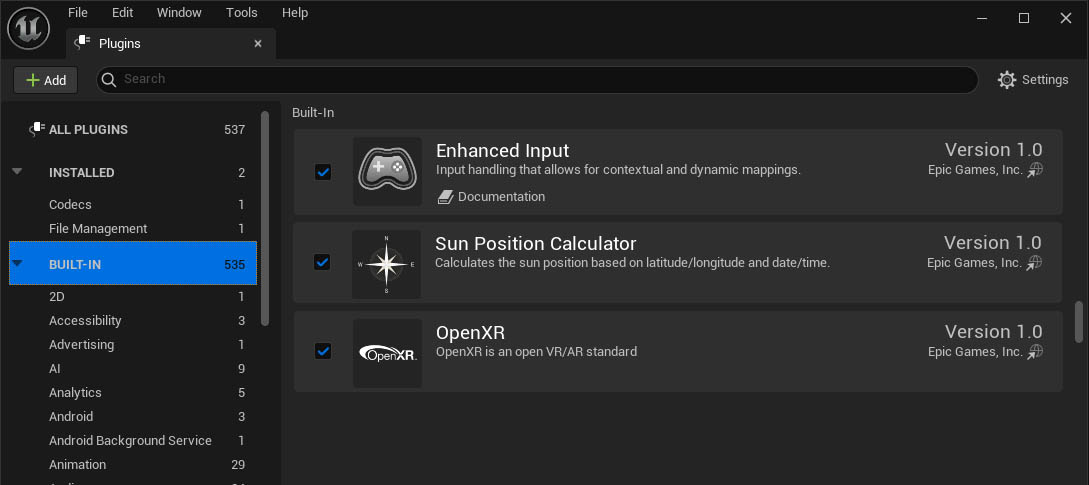
Plugins
The following plugins should be installed in your project even if you don't intend to use them:- Enhanced Input - controls input actions from keyboard or gamepad
- Sun Position Calculator - Accurate sun positioning for geo location
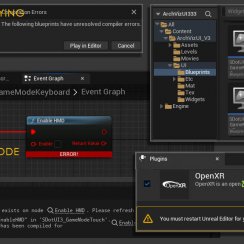
- OpenXR - standard used for VR headsets. - You may need a different one.
Packaging will fail if these plugins are missing.
Post Process Volume
There needs to be at least one post process volume in the scene. Many render settings need to be set there. Set the Volume Settings to Infinite Extend (Unbound)Specific areas can have additional Volumes with a higher priority. Settings in this volume will overwrite settings in the volume with the lower priority. Infinite Extend would need to be disabled for the additional volumes.
The image shows my preferred settings for Unreal Engine 5.4. I still prefer ray-traced translucency without refraction over the Lumen translucency.
Increased quality will always reduce performance.

World Settings
Open the World Settings and choose the Game Mode Override for your project. Currently 4 modes are available:- SDotUI3_GameModeKeyboard for keyboard and mouse control. Optional mouse only controls available.
- SDotUI3_GameModeTouch for touch screen support.
- SDotUI3_GameModeGamepad for using an XBOX gamepad or other controllers.
- SDotUI3_GameModeVR for VR projects with a 3D interface in front of the player. VIVE and Oculus Touch controllers are set to be used.
This will set the Character and Game Controller blueprints for the current scene. Click the link below for more details about the different game modes.
In case you prefer Static Lighting I recommend these Lightmass settings:
- Static Lighting Level Scale = 0.75
- Indirect Lighting Quality = 1.25
- Num indirect lighting bounces = 5
- Num sky light bounces = 3

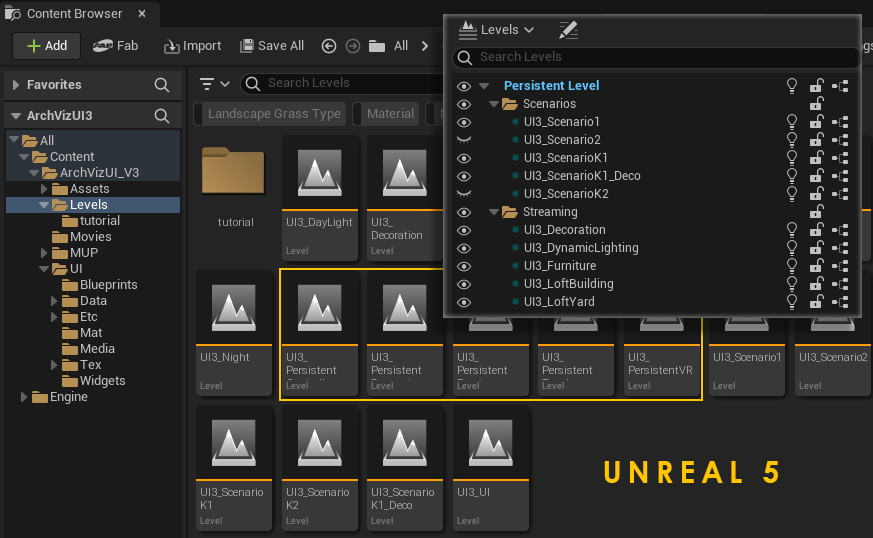
Scenario Levels
were introduced to store the entire lighting information in one level to make day and night changes in baked lighting projects possible.
The UI3 uses scenario sub-levels for layout changes. They will be streamed in and out depending on what layout scenario is selected.
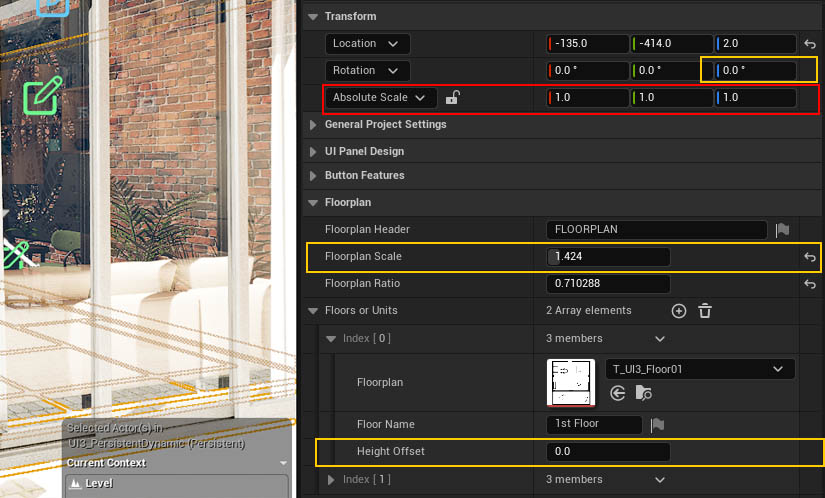
| Floorplan | |
| Floorplan Scale | Manually scale the floorplan here. This makes sure that the XY ratio stays intact. |
| > Floors or Units | Use the (+) icon to add floors or units. |
| Floorplan | Drawings have to be black on white background |
| Height Offset | start with the lowest floor and add the height offset from that level to each additional floor above. |
Use Transform to align the location and the rotation.
| Transform | |
| Location | Move the floorplan roughly to the correct position |
| Rotation | Use the Z rotation to align the floorplan to the building |
| Scale | Do not change the scale |

 Top of page
 Video Tutorial Playlist